This is a guide on how to Create & Manage Android Virtual Device (AVD) in Android Studio. We learned how to install Android Studio in the windows. Before starting with the Android App development using Android Studio, we need to create an Android Virtual Device (AVD). The AVD is then used by the Android emulator to mimic the real device so that we can test our application. To Create AVD we first need to Install AVD Manager. We also need to Install Android Emulator. We will learn all these in this guide.
Before going further, we need to know what is AVD Manager, AVD ( Android Virtual Device) and Android Emulator.
Table of Contents
What is AVD Manager?
The AVD Manager is a GUI interface provided by Android Studio to create and manage Android Virtual Devices. We can create as many as AVD’s and configure them by specifying the hardware and software parameters.
You can access the AVD Manager from the Android Studio from the menu Tools -> AVD Manager ( or Tools -> Android -> AVD Manager in the older version of the studio).
How to Install AVD Manager?
AVD Manager is installed, when you install Android Studio. We have an article on how to Install Android Studio, which you can refer to.
What is Android Emulator
The Android emulator is a program that takes the configuration from the Android Virtual Device (AVD). It then simulates the device on your computer. The emulator allows us to develop and test Android applications without using a real device. The Android Emulator needs AVD to run. You need to specify which AVD to use to the Android Emulator and emulator mimics the device.
Why use Android Emulator
You can use the real device to run and test your Android application, which is actually a better and faster way to test your app
But, you need a device of every size, type (like the tablet, phone, wear, tv), etc and with the various configuration like RAM, API Version, Network supported, etc. This is something which is not possible if you are using the real device. Also, the devices with the new features keep coming out at regular intervals.
With Android Emulator you can create a virtual device of any configuration, size, type. You can test your app on various types of devices simultaneously before releasing it to the Production.
How does the Emulator work
The Android emulator uses the Operating system Virtualization technologies to mimic the real device on your PC.
Operating system virtualization is the technique, where software is used to run many operating systems in the hardware at the same time. Some of the virtualization technologies used in windows are
- Hyper-V
- Virtual Box
- Intel HAXM
Intel’s HAXM (Hardware Accelerated Execution Manager) is used by the Android Emulator.
A Windows CPU can support only one virtualization technology at a time. The Hyper-V is installed, when you install the Windows OS. if it is enabled, you need to disable it.
How to Install Android Emulator
The Android Emulator is installed, when you install Android Studio.
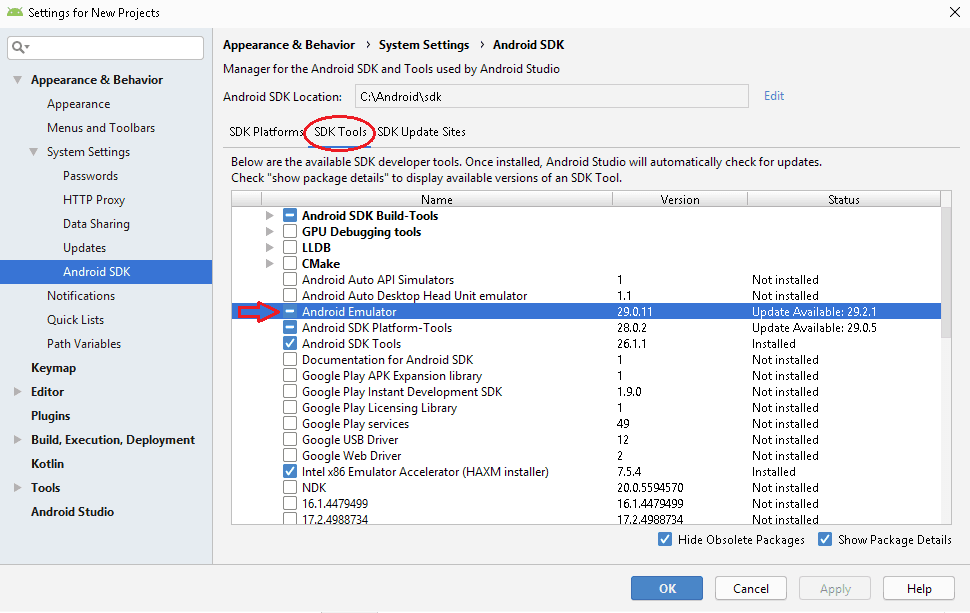
You can go to Android SDK Manager -> SDK Tools and check if the Android Emulator is installed or not. You can also check if the updates are available. select the checkbox and click on the OK button to install or update the Android Emulator.
System Requirement to run Android Emulator
Android Emulator is notorious to consume a lot of memory & CPU. I would recommend a minimum of 16GB RAM and the latest CPU.
The latest version of the Android Emulator does not support 32bit OS. The support for the older 32-bit version will stop in June 2020. Hence prepare to move to 64bit OS at earliest.
The following is the recommended system configuration for Android Emulator.
- Microsoft Windows 7 and above either 32bit/64bit.
- 3 GB RAM minimum, 8 GB RAM recommended
- 2 GB of available disk space minimum,
- 4 GB Hard disk space Recommended (500 MB for IDE + 1.5 GB for Android SDK and emulator system image)
- 1280 x 800 minimum screen resolution
What is an Android Virtual Device
An Android Virtual Device (AVD) is an emulator configuration that represents a specific Android device. An AVD contains a hardware profile, system image, storage area, skin, and other properties specific to the device.
You have to create AVD for every device that you want to test.
Creating AVD
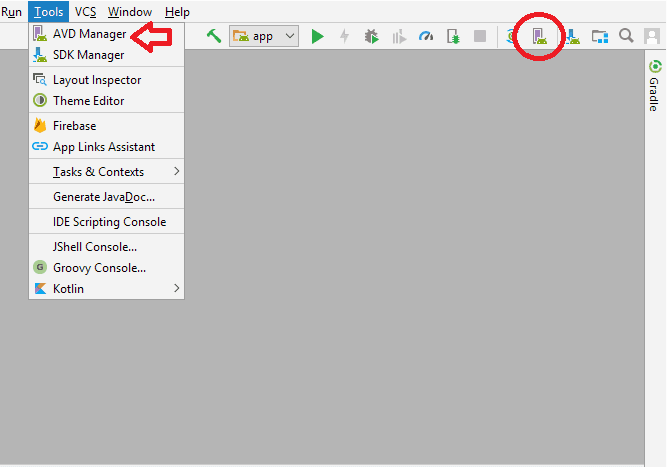
- Start Android Studio and open the AVD Manager
- Tools -> AVD Manager ( or Tools -> Android -> AVD Manager )
- Click the AVD Manager icon in the toolbar.
Create New Virtual Device
If you are starting the AVD Manager for the first time, you will see the following screen. Else you will see the list of AVDs created.
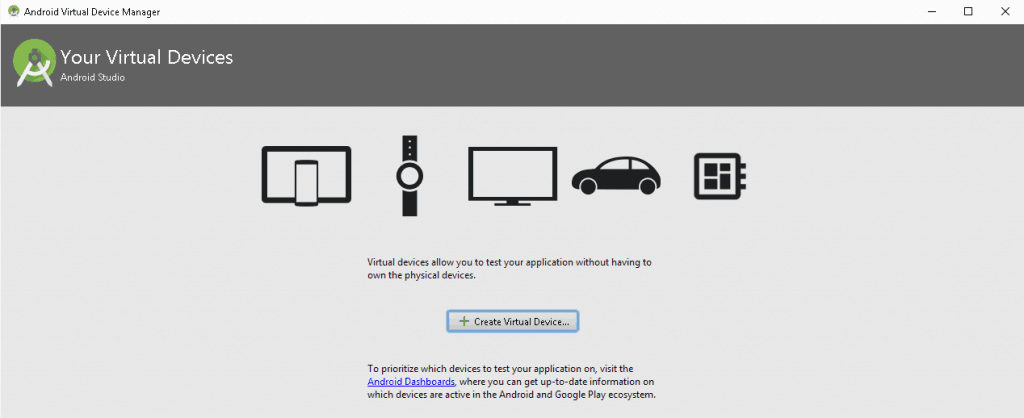
Click on Create Virtual Device to continue
Select Hardware
This will take you to select Hardware Page. This page lists the devices which can be used to generate the Android Virtual Device
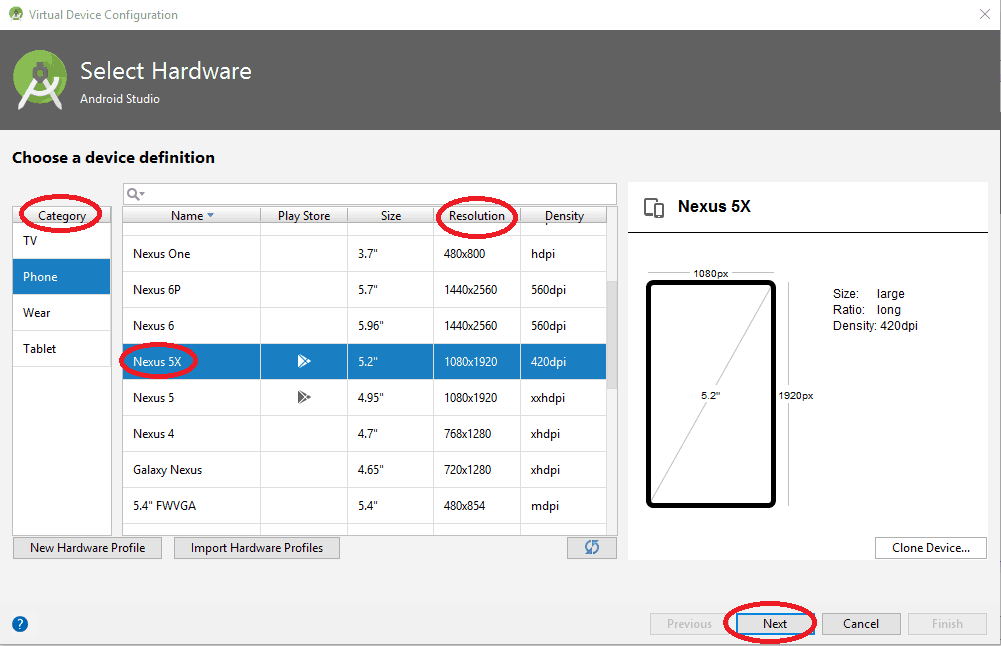
In the left-hand panel displays a list of the Category of the device. It includes TV, Phone, Wear & Tablet. Select the category.
The middle pane displays the list of devices available. Select one based on the requirement of your app. After this click on the Next button.
Note that phones with larger resolution Choose the pixels resolution according to your requirements as it will take huge RAM in large pixels resolution device. If your computer has low RAM then prefer to choose less resolution device.
Click Next to continue
Select System Image
The Recommend tab lists the recommended system images for the Hardware you have selected in the last page. There x86 images and other images tabs also display the list of images.
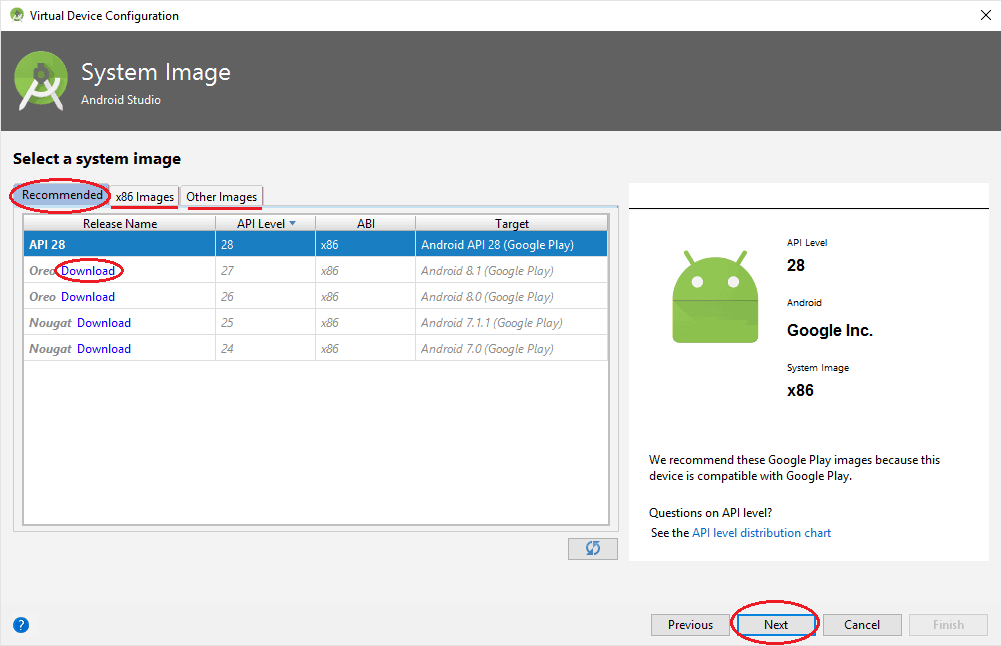
The download link next to each system image name indicates that the image is not yet downloaded into the system. Click on download to download the image.
Choose the system image based on the API level targeted by your App. The app won’t run if you choose lower API than the one target by the App
Select the image and click on Next to continue.
Verify Configuration
The Final Window is Verify Configuration.
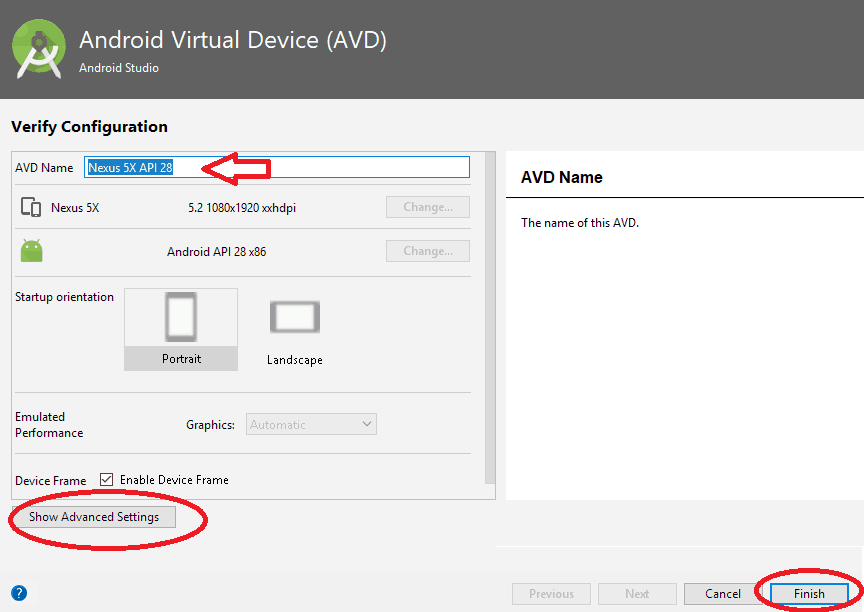
Here you can name your AVD, change startup orientation and few other hardware properties. Click on Show Advanced Settings to show more settings.
Click on Finish to create the AVD.
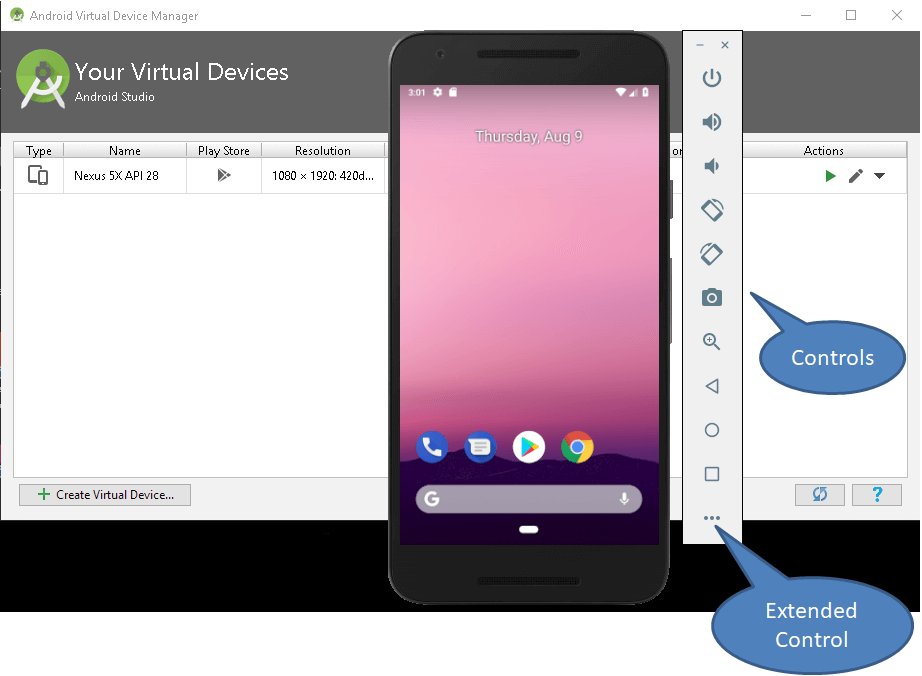
Managing the AVD
Opening the AVD Manager takes you to the List of AVDS

Running/Stopping the AVD
Under the action column, click on the ![]()
![]() icon to run the AVD. The Android Emulator uses the AVD to mimic the device. You can then use the control panel to manage the device. The Extend control button at the bottom gives you more options.
icon to run the AVD. The Android Emulator uses the AVD to mimic the device. You can then use the control panel to manage the device. The Extend control button at the bottom gives you more options.
Click on the ![]()
![]() icon to edit the AVD. Right-click anywhere on the device and click on delete to delete. Right-Click menu also gives options to duplicate, delete, wipe data, cold start & stop the AVD.
icon to edit the AVD. Right-click anywhere on the device and click on delete to delete. Right-Click menu also gives options to duplicate, delete, wipe data, cold start & stop the AVD.
References
Summary
In this tutorial, we learned how to create and manage Android Virtual Devices. In the next tutorial, we will how to create a Simple NativeScript Application
Well understood