The Angular ngIf is a Structural Directive that allows us to completely add or remove DOM Elements based on some condition. In this Tutorial, let’s learn what ngIf is and how to use it in Angular. We will show you how to add or remove elements using an example. We will also look at the optional else & then clause using the ng-template.
Table of Contents
ngIf Syntax
The syntax of ngIf is as follows.
1 2 3 4 5 | <p *ngIf="condition"> content to render when the condition is true </p> |
We attach the ngIf directive to a DOM element ( p element in the above example). Since ngIf is a structural directive, we can add it to any element like div, p, h1, component selector, etc. Like all structural directives, it is prefixed with * an asterisk.
We bind the *ngIf to an expression (a condition in the above example). The expression is then evaluated by the ngIf directive. The expression must return either true or false.
If the ngIf expression evaluates to false, then the Angular removes the entire element from the DOM. If true, it will insert the element into the DOM.
The following code uses ngIf to conditionally render a button based on a boolean variable showButton. The button is shown only when the showButton is true.
1 2 3 | <button *ngIf="showButton">Click Me!</button> |
You can mimic the else condition shown here by using the Logical NOT (!).
1 2 3 4 5 | <p *ngIf="!condition"> content to render, when the condition is false </p> |
The better solution is to use the optional else block, as shown in the subsequent section.
Condition
The condition can be anything. It can be a property of the component class. It can be a method in the component class. But it must evaluate as true/false. The ngIf directive tries to coerce the value to Boolean.
1 2 3 4 5 | <p [hidden]="condition"> content to render, when the condition is true </p> |
The above achieves the same thing, with one vital difference.
ngIf does not hide the DOM element. It removes the entire element along with its subtree from the DOM. It also removes the corresponding state freeing up the resources attached to the element.
The hidden attribute does not remove the element from the DOM. But hides it.
The difference between [hidden]='true' and *ngIf='false' is that the first method hides the element. The second method ngIf removes the element completely from the DOM.
ngIf else
The ngIf allows us to define optional else block using the ng-template
1 2 3 4 5 6 7 8 9 | <div *ngIf="condition; else elseBlock"> content to render, when the condition is true </div> <ng-template #elseBlock> content to render, when the condition is false </ng-template> |
The expression starts with a condition followed by a semicolon.
Next, we have else clause bound to a template named elseBlock. The template can be defined anywhere using the ng-template. Place it right after ngIf for readability.
When the condition evaluates to false, then the ng-template with the name #elseBlock is rendered by the ngIf Directive.
ngIf then else
You can also define then else block using the ng-template
1 2 3 4 5 6 7 8 9 10 11 12 13 | <div *ngIf="condition; then thenBlock else elseBlock"> This content is not shown </div> <ng-template #thenBlock> content to render when the condition is true. </ng-template> <ng-template #elseBlock> content to render when condition is false. </ng-template> |
Here, we have then clause followed by a template named thenBlock.
When the condition is true, the template thenBlock is rendered. If false, then the template elseBlock is rendered
ngIf Example
Create a new Angular project by running the command ng new ngIf
Component Class
Create a boolean variable showMe in your app.component.ts class as shown below
1 2 3 4 5 6 7 8 9 10 11 12 13 | import { Component } from '@angular/core'; @Component({ selector: 'app-root', templateUrl: './app.component.html', styleUrls: ['./app.component.css'] }) export class AppComponent { title: string = 'ngIf Example' ; showMe: boolean; } |
Template
Copy the following code to the app.component.html.
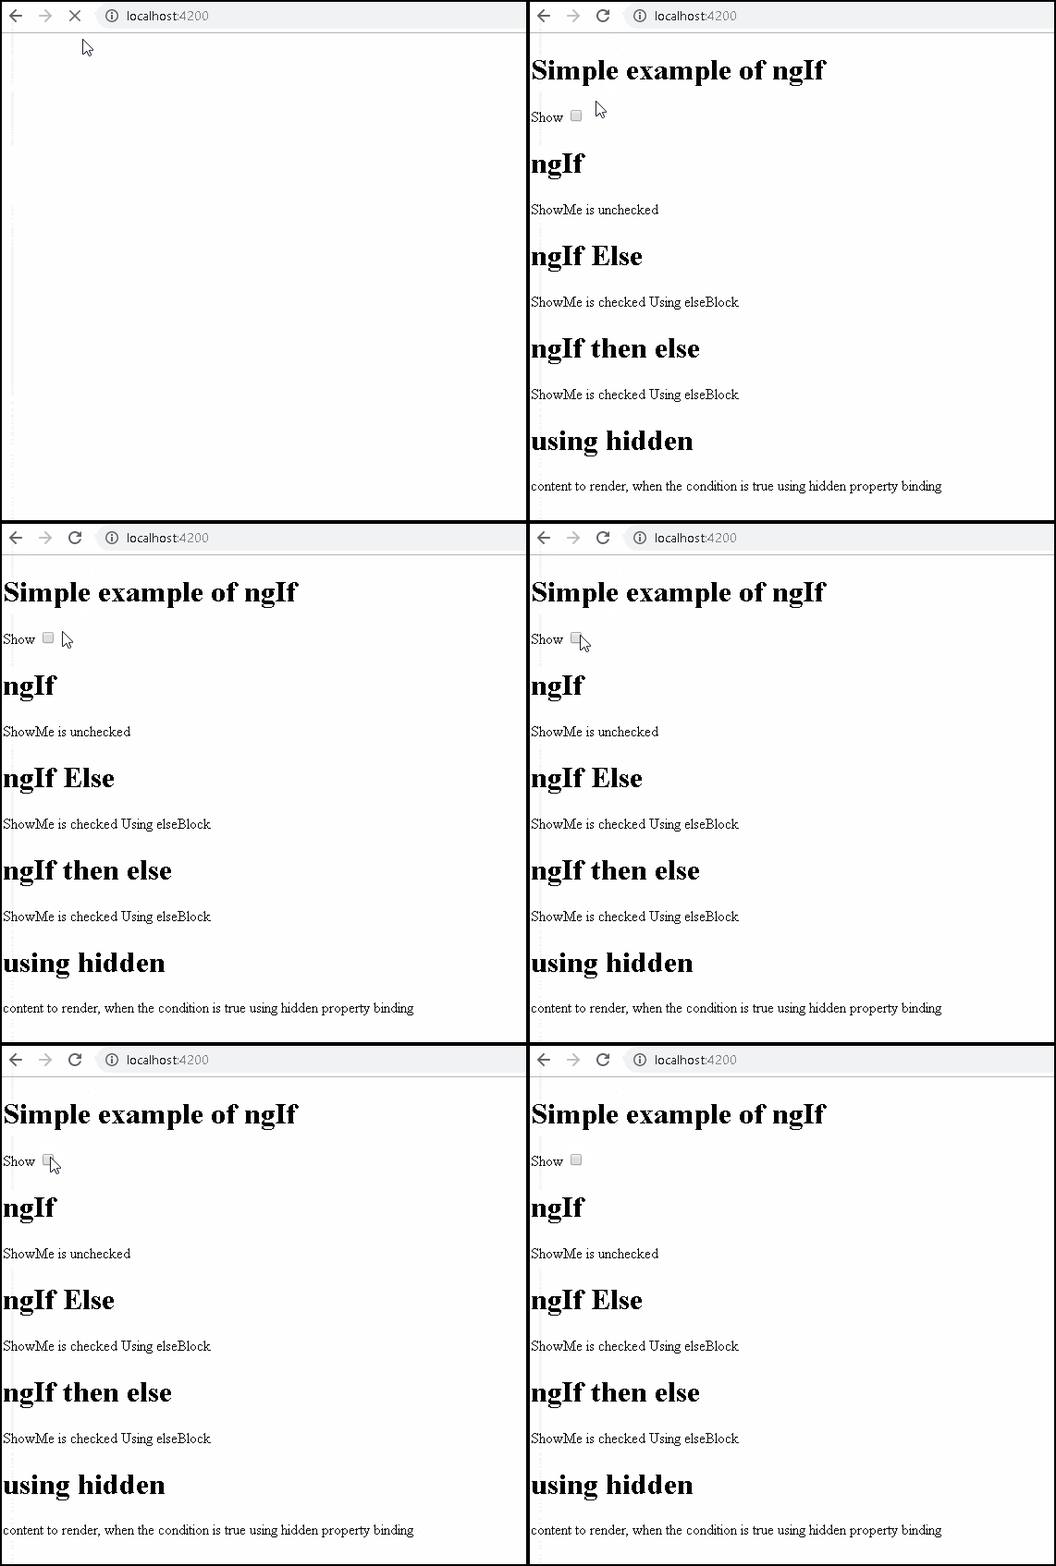
1 2 3 4 5 6 7 8 9 10 11 12 13 14 15 16 17 18 19 20 21 22 23 24 25 26 27 28 29 30 31 32 33 34 35 36 37 38 39 40 41 42 43 44 45 46 47 48 49 50 51 | <h1>Simple example of ngIf </h1> <div class="row"> Show <input type="checkbox" [(ngModel)]="showMe" /> </div> <h1>ngIf </h1> <p *ngIf="showMe"> ShowMe is checked </p> <p *ngIf="!showMe"> ShowMe is unchecked </p> <h1>ngIf Else</h1> <p *ngIf="showMe; else elseBlock1"> ShowMe is checked </p> <ng-template #elseBlock1> <p>ShowMe is unchecked Using elseBlock</p> </ng-template> <h1>ngIf then else</h1> <p *ngIf="showMe; then thenBlock2 else elseBlock2"> This is not rendered </p> <ng-template #thenBlock2> <p>ShowMe is checked Using thenblock</p> </ng-template> <ng-template #elseBlock2> <p>ShowMe is unchecked Using elseBlock</p> </ng-template> <h1>using hidden </h1> <p [hidden]="showMe"> content to render, when the condition is true using hidden property binding </p> <p [hidden]="!showMe"> content to render, when the condition is false. using hidden property binding </p> |
Now let us examine the code in detail
1 2 3 | Show <input type="checkbox" [(ngModel)] ="showMe"/> |
This is a simple checkbox bound to showMe variable in the component
1 2 3 4 5 | <div *ngIf="showMe"> ShowMe is checked </div> |
The ngIf directive is attached to the div element. It is then bound to the expression “showMe”. The expression is evaluated and if it is true, then the div element is added to the DOM else it is removed from the DOM.
1 2 3 4 5 6 7 8 9 | <p *ngIf="showMe; else elseBlock1"> ShowMe is checked </p> <ng-template #elseBlock1> <p>ShowMe is checked Using elseBlock</p> </ng-template> |
If else example.
1 2 3 4 5 6 7 8 9 10 11 12 13 | <p *ngIf="showMe; then thenBlock2 else elseBlock2"> This is not rendered </p> <ng-template #thenBlock2> <p>ShowMe is checked Using thenblock</p> </ng-template> <ng-template #elseBlock2> <p>ShowMe is unchecked Using elseBlock</p> </ng-template> |
If then else example. Note that the content of p element, to which ngIf is attached is never rendered
1 2 3 4 5 6 7 8 9 10 11 | <h1>using hidden </h1> <p [hidden]="showMe"> content to render, when the condition is true using hidden property binding </p> <p [hidden]="!showMe"> content to render, when the condition is false. using hidden property binding </p> |
The property binding on the hidden attribute. You can open the developer console and see that Angular renders both elements. But mark one of them as visible and the other one as hidden.
Module
Import FormsModule in app.module.ts as we are using ngModal directive
1 2 3 4 5 6 7 8 9 10 11 12 13 14 15 16 17 18 19 20 21 22 23 | import { BrowserModule } from '@angular/platform-browser'; import { NgModule } from '@angular/core'; import { FormsModule } from '@angular/forms'; import { AppRoutingModule } from './app-routing.module'; import { AppComponent } from './app.component'; @NgModule({ declarations: [ AppComponent ], imports: [ BrowserModule, AppRoutingModule, FormsModule ], providers: [], bootstrap: [AppComponent] }) export class AppModule { } |

References
Summary
In this tutorial, we learned how to make use of ngIf directive to add/remove the DOM element. The ngIf can be used along with the optional then and else clause.


The difference between [hidden]=’false’ and *ngIf=’false’ is that the first method simply hides the element. The second method with ngIf removes the element completely from the DOM.
Kindly check the difference between hidden and *ngIf
[hidden] = ‘false’ –> Its shows the element.
Thanks. Updated the article
Best explanation more than video. Thank You.