In this tutorial let us create a simple Entity Framework Code First Example application. We learn what is Entity Framework in the previous tutorial. In this article, we will show how to build a simple code first console application. We will show you how to create a simple entity. We will also show you how to perform simple CRUD operations on that entity and persist the entity to the database.
Link to all Entity Framework Tutorial articles
Software Versions used in the tutorial
- Visual Studio 2015
- Entity framework 6.2.0.
- .NET 4.5
- C#
Table of Contents
What is Code First
In the Code First approach, you manually create the entity domain model (EDM) classes in your application. The database is created from these classes. This gives you the direct control of what is being generated in the database. The Visual model designer is not used in the code first approach. Code First follows the Domain-Driven Design (DDD) principles.
In this tutorial, we will create a simple application with a user class. Our user class will have basic information like name and email address of the user.
Create the Code First Example Project
- Open Visual Studio.
- File ->New -> Project
- Select Template -> Visual C# -> Windows
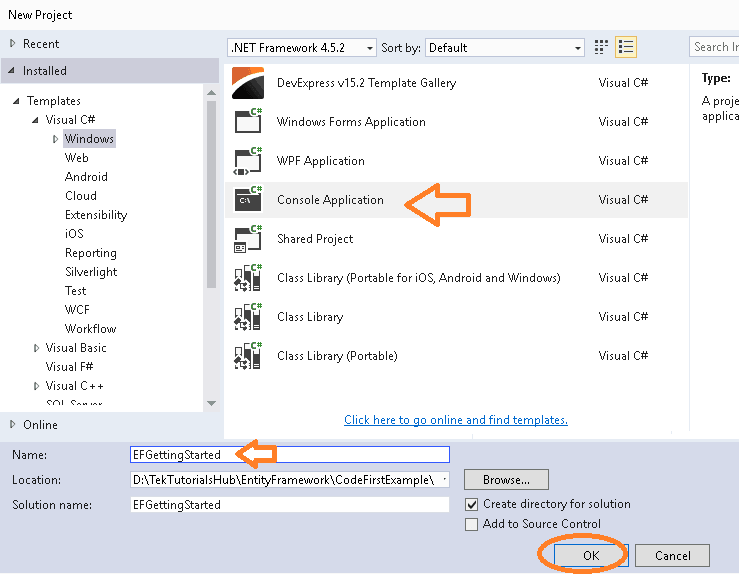
- Select Console Application
- Name the application as “EFGettingStarted”
- Click on OK
Installing Entity Framework
The next step is to install the Entity framework. This can be installed via NuGet package console. Click on Tools->Nuget Package manager -> Package Manager Console and type the following command
install-package entityframework
This will install the latest version of the Entity Framework (6.2.0).
Entity Type
The next step is to create the Entity Data Model (EDM)
- Select the Project
- Right click and click on add -> Class
- Name the class as Model.cs
- Copy the following code to the model.cs
  public class User
    {
        public int UserID { get; set; }
        public string Name { get; set; }
        public string Email { get; set; }
    }
We are done with our entity model.
DBContext
The DbContext (often referred to as context) is the class which is responsible for interacting with the entity model and the data store. It allows you to query, insert, update and delete operations on the entities. This class is derived from the system.data.entity.dbcontext namespace. The older version of the entity framework used objectContext. DbContext is actually a wrapper around the objectContext class.
The DBContext is the heart of the Entity Framework. It has several responsibilities. It Manages the database, Manages database connections, creates & initializes the database. It queries for data and converts them models by using the process called materialization. It keeps track of the added, modified & deleted entities in the memory and updates the database when asked for.
You can read more about what is dbcontext in entity framework
Creating the Context
You can add a DbContext in your project by creating a class which derives from the DbContext class
- Select the Project
- Right Click -> Add -> Class
- Name the class as EFContext.cs
- Click on Add
- Import the namespace System.Data.Entity
- Make the EFContext class as public and inherit it from the DbContext class
using System.Data.Entity;
namespace EFGettingStarted
    {
        public class EFContext :DbContext
        {
        }
     }
Now we have added the Context class EFContext to our project
DBSet
As mentioned above DbContext class exposes the generic version of DbSet which represents the collection of entities (entity set). Each entity type must expose the DbSet property so that they can be used in CRUD Operations
DbSet provides the methods to manage the entity set. To Add DbSet Property to your class add the following in the context class
public DbSet<User> Users { get; set; }Finally, our EFContext class looks like this
    public class EFContext :DbContext
    {
        public DbSet<User> Users { get; set; };
    }
Adding data
We have defined our model (user class) and the context (EFContext). Now it is time to create a new user
Open the program class. In the main method of the class, paste the following code
private static void addUser()
{
  Console.WriteLine("adding user ");
  User usr = new User() { Name = "Sachin", Email = "[email protected]" };
  try
  {
    using (var ctx = new EFContext())
    {
      ctx.Users.Add(usr);
      ctx.SaveChanges();
    }
  }
  catch (Exception ex)
  {
    Console.WriteLine(ex.Message);
  }
}
In the above code, we created a new user instance.
User usr = new User() { Name = "Sachin Tendulkar", Email = "[email protected]" };Then, we created an instance of the DbContext object.
var ctx = new EFContext()The DbContext returns the Users Entity set (DbSet<TEntity>). We invoked the add method of the Users object and passed the newly created user instance.
ctx.Users.Add(usr);Finally, we invoked the SaveChanges method of the DbContext object to save the changes to the database.
ctx.SaveChanges();Now we are ready to test our application. Open the Main method of the program class and add the following code.
static void Main(string[] args)
{
  addUser();

  Console.WriteLine("Press any key to close");
  Console.ReadKey();
}
Run the Application. If everything is ok then you should see “press any key to close” message. Press any key and console window will close.
Read More:
Add Records in Entity Framework
Where is the database
We have not defined our database connection string. The EF is smart enough to discover and create the database for us. The EF uses a series of steps to discover and initialize the database. The Process is also called as database initialization.
In the absence of any Connection String provided in the app.config file, the EF creates the database either in localdb or SQL Express depending on the system.
In Visual Studio go to View->SQL Server Object Explorer option.
Under SQL Server, you should be able to see either (localdb)\V11.0 or (localdb)\MSSQLLocalDB. Expand the nodes and you will see that the database by the name “EFGettingStarted.EFContext” is created.
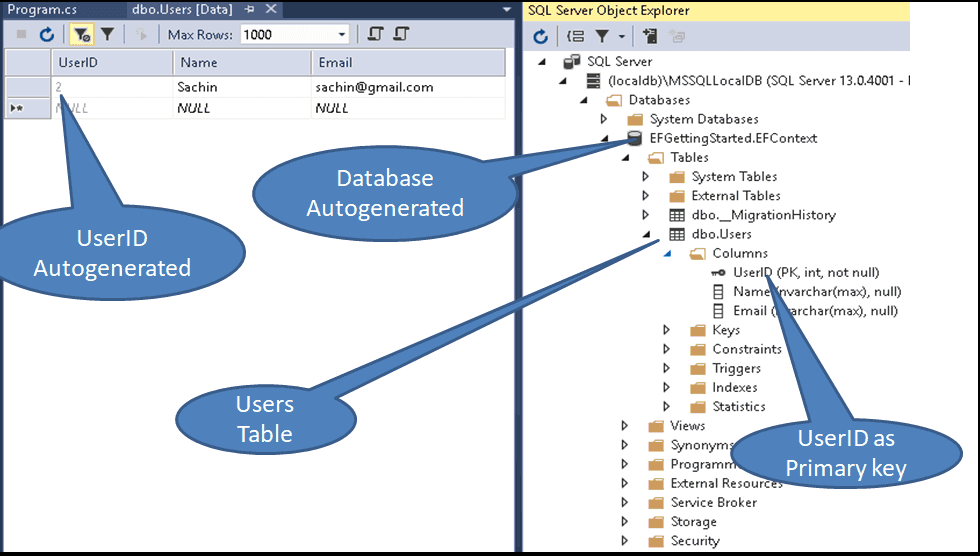
As you can see from the above image, Entity Framework has created users table with the column for each property. Few important things to note that
- The Database was automatically created by EF
- Name of the database is “EFGettingStarted.EFContext”, which is the fully qualified name of the DbContext class
- The Table names are pluralized. Our Entity class name was User. The Table name is Users
- Column UserID is automatically configured as Primary Key.
- The UserID is also configured as the identity column
The Code First does this by using Code-first conventions. It uses the model to create the database and build the tables and columns of the tables.
Querying the data
The next option is to query the data.
private static void findUser(int id)
{
  Console.WriteLine("finding " + id);
  try
  {
    using (var ctx = new EFContext())
    {
      var user = ctx.Users.Find(id);

      if (user != null)
      {
        Console.WriteLine("found " + user.UserID + " " + user.Name);
      }
      else
      {
        Console.WriteLine("user not found");
      }
    }
  }
  catch (Exception ex)
  {
     Console.WriteLine(ex.Message);
  }
}
The querying is done by the find method, which takes the Primary key(s) as the argument and retrieves the matching row from the database and populates the entity.
var user = ctx.Users.Find(id);Next, we check the returned entity for null & display the result
if (user != null)
{
  Console.WriteLine("found " + user.UserID + " " + user.Name);
}
else
{
  Console.WriteLine("user not found");
}
Open the program.cs and copy the following code
static void Main(string[] args)
{
   //addUser();
   findUser(1);

   Console.WriteLine("Press any key to close");
   Console.ReadKey();
}
Read More:
Querying in Entity Framework
Editing the Data
Next, let us try to edit the entity
private static void editUser(int id)
{
  Console.WriteLine("editing " + id);
  try
  {
    using (var ctx = new EFContext())
    {
      var user = ctx.Users.Find(id);
      if (user!=null)
      {
        user.Name = "Sachin Tendulkar";
        ctx.SaveChanges();
      }
      else
      {
        Console.WriteLine("user not found");
      }
  }
}
  catch (Exception ex)
  {
    Console.WriteLine(ex.Message);
  }

  findUser(id);
}
To Edit and entity, we need to get the entity from the database using the find method
var user = ctx.Users.Find(1);Next, Modify the desired fields
user.Name = "Sachin Tendulkar";Finally, call saveChanges to update the database;
ctx.SaveChanges();Read More :
Update Records Entity Framework
Deleting the data
To Delete the entity, first use find method the get the entity. Then use the Remove method to remove it from the context. Finally call the savechanges method to update the database
private static void deleteUser(int id)
{
   Console.WriteLine("deleting "+id);

   try
   {
     using (var ctx = new EFContext())
     {
       var user = ctx.Users.Find(id);
       if (user != null)
       {
         Console.WriteLine("deleting " + user.UserID + " " + user.Name);
         ctx.Users.Remove(user);
         ctx.SaveChanges();
       }
       else
       {
         Console.WriteLine("user not found");
       }
    }
  }
  catch (Exception ex)
  {
    Console.WriteLine(ex.Message);
  }
  findUser(id);

}
Read More:
Delete Records Entity Framework
References
Summary
In this tutorial, we have created a simple code first example application to demonstrate the CRUD operation on users entity. We learned how to create a model. learnt how to create the Dbcontext class and create DBSet property of the model. Finally, we implemented a simple CRUD operations using console application.


please keep generate this type of quality content.than you.
When I paste the code into my Program.cs file, I get an error in my ctx.Users.Add(usr); line. The error is under the Users and it says EFContext.Users is inaccessible due to its protection level. I’m not sure what is going on because everything in my Model.cs is public like in the example.
Is your DbSet in EFContext.cs also public as well? I only ask because I was getting the same error, and that turned out to be my problem.
change the modifier to public