The Angular CanDeactivate Guard determines whether we can navigate away from a route. In this tutorial, we will learn what is CanDeactivate Guard is and how to use it with a simple CanDeactivate example application.
Table of Contents
What is CanDeactivate Guard
The Angular CanDeactivate guard is called, whenever we navigate away from the route before the current component gets deactivated.
The best use case for CanDectivate guard is the data entry component. The user may have filled the data entry and tries to leave that component without saving his work. The CanDeactivate guard gives us a chance to warn the user that he has not saved his work and give him a chance to cancel the navigation.
How to use CanDeactivate Guard
First, we need to create an Angular Service.
The service must import & implement the CanDeactivate Interface. This Interface is defined in the @angular/router module. The Interface has one method i.e. canDeactivate. We need to implement it in our Service. The details of the CanDeactivate interface is as shown below.
interface CanDeactivate<T> {
  canDeactivate(component: T,
                currentRoute: ActivatedRouteSnapshot,
                currentState: RouterStateSnapshot,
                nextState?: RouterStateSnapshot): Observable<boolean | UrlTree> | Promise<boolean | UrlTree> | boolean | UrlTree
}
The method gets the instance of the component being deactivated as the first argument.
The method also gets the instance of the ActivatedRouteSnapshot, the current state of the RouterStateSnapshot, next state of the RouterStateSnapshot. We can use this to get access to the route parameter, query parameter, etc.
The guard must return true/false or a UrlTree . The return value can be in the form of observable or a promise or a simple boolean value.
A route can have more than one canDeactivate guard.
If all guards return true, the component will get deactivated and you will navigate to the next route.
If anyone of the guard returns false, navigation will be canceled and you will stay in the same route/component.
If any one of the guards returns a UrlTree, current navigation will be canceled and new navigation will be kicked off to the UrlTree returned from the guard. The current component will get deactivated.
The example of canDeactivate the guard is as follows
CanDeactivate Example
First create a component, with a method canExit, which returns a boolean. In the canExit method, you can check if there are any unsaved data, etc. If Yes, then ask for confirmation whether the user wants to leave or not. Return true to exit the component else return false to stay in the same component.
import { Component } from '@angular/core';

@Component({
  templateUrl: "register.component.html",
})
export class RegisterComponent

   //Check if there any unsaved data etc. If yes then as for confirmation
  canExit() : boolean {

  if (confirm("Do you wish to Please confirm")) {
      return true
    } else {
      return false
    }
  }

}
Next, create a guard service, which implements the CanDeactivate Interface.
import { Injectable } from '@angular/core';
import { CanDeactivate } from '@angular/router/src/utils/preactivation';
import { ActivatedRouteSnapshot, RouterStateSnapshot } from '@angular/router';
import { Observable } from 'rxjs';
import { RegisterComponent } from './register.component';

@Injectable()
export class DeactivateGuard implements CanDeactivate
{
    component: Object;
    route: ActivatedRouteSnapshot;

   constructor(){
   }

   canDeactivate(component:RegisterComponent,
                route: ActivatedRouteSnapshot,
                state: RouterStateSnapshot,
                nextState: RouterStateSnapshot) : Observable<boolean> | Promise<boolean> | boolean {

        return component.canExit();

  }

}
Update the route definition with the canDeactivate guard as shown below. You can apply more than one guard to a route and a route can have more than one guard
{ path: 'register', component: RegisterComponent, canDeactivate:[DeactivateGuard] },The guard created in the above example is specific to RegisterComponent. We can create a general-purpose DeactivateGuard Service and use it everywhere, by making use of the interface
General Purpose DeactivateGuard Service
First Define an Interface IDeactivateComponent as shown below
export interface IDeactivateComponent {
    canExit: () => Observable<boolean> | Promise<boolean> | boolean;
}
Next, Open the component, where you wish to implement the Deactivate Guard. In our case it is RegisterComponent. Make the component implement the IDeactivateComponent as shown below. Implement the canExit method
import { Component } from '@angular/core';
import { IDeactivateComponent } from './decativate.guard';


@Component({
  templateUrl: "register.component.html",
})
export class RegisterComponent implements IDeactivateComponent
{

   //Check if there any unsaved data etc. If yes then as for confirmation
  canExit() : boolean {

  if (confirm("Do you wish to Please confirm")) {
      return true
    } else {
      return false
    }
  }

}
Now, in the guard service, use the IDeactivateComponent interface instead of the actual component.
@Injectable()
export class DeactivateGuard implements CanDeactivate
{
    component: Object;
    route: ActivatedRouteSnapshot;

   constructor(){
   }

   canDeactivate(component:IDeactivateComponent,
                route: ActivatedRouteSnapshot,
                state: RouterStateSnapshot,
                nextState: RouterStateSnapshot) : Observable<boolean> | Promise<boolean> | boolean {

        return component.canExit ? component.canExit() : true;
  }

}
Complete Source Code
<div class="container">
<nav class="navbar navbar-default">
  <div class="container-fluid">
    <div class="navbar-header">
      <a class="navbar-brand" [routerLink]="['/']"><strong> {{title}} </strong></a>
    </div>
    <ul class="nav navbar-nav">
        <li><a [routerLink]="['home']">Home</a></li>
        <li><a [routerLink]="['register']">Register</a></li>
        <li><a [routerLink]="['contact']">Contact us</a></li>

    </ul>
  </div>
</nav>
 <router-outlet></router-outlet>
</div>
import { Component } from '@angular/core';
import { Router } from '@angular/router';
@Component({
selector: 'app-root',
templateUrl: './app.component.html'
})
export class AppComponent {
title = 'Routing Module - Route Guards Demo';
constructor (private router:Router) {
}
}
import { BrowserModule } from '@angular/platform-browser';
import { NgModule } from '@angular/core';
import { HttpModule } from '@angular/http';
import { FormsModule }    from '@angular/forms';
import { RouterModule } from '@angular/router';
import { AppComponent } from './app.component';
import { HomeComponent} from './home.component'
import { ContactComponent} from './contact.component'
import { appRoutes } from './app.routes';
import { RegisterComponent } from './register.component';
import { DeactivateGuard } from './decativate.guard';
@NgModule({
  declarations: [
    AppComponent,HomeComponent,ContactComponent,RegisterComponent
  ],
  imports: [
    BrowserModule,
    FormsModule,
    HttpModule,
    RouterModule.forRoot(appRoutes)
  ],
  providers: [DeactivateGuard],
  bootstrap: [AppComponent]
})
export class AppModule { }
import { Routes } from '@angular/router';
import { HomeComponent} from './home.component'
import { ContactComponent} from './contact.component'
import { RegisterComponent } from './register.component';
import { DeactivateGuard } from './decativate.guard';
export const appRoutes: Routes = [
  { path: 'home', component: HomeComponent },
  { path: 'contact', component: ContactComponent },
  { path: 'register', component: RegisterComponent, canDeactivate:[DeactivateGuard] },
  { path: '', redirectTo: 'home', pathMatch: 'full' },
];
import { Injectable } from '@angular/core';
import { CanDeactivate } from '@angular/router/src/utils/preactivation';
import { ActivatedRouteSnapshot, RouterStateSnapshot } from '@angular/router';
import { Observable } from 'rxjs';
import { RegisterComponent } from './register.component';
export interface IDeactivateComponent {
    canExit: () => Observable<boolean> | Promise<boolean> | boolean;
}
@Injectable()
export class DeactivateGuard implements CanDeactivate
{
    component: Object;
    route: ActivatedRouteSnapshot;
   constructor(){
   }
   canDeactivate(component:IDeactivateComponent,
                route: ActivatedRouteSnapshot,
                state: RouterStateSnapshot,
                nextState: RouterStateSnapshot) : Observable<boolean> | Promise<boolean> | boolean {

        return component.canExit ? component.canExit() : true;
  }

}
import {Component} from '@angular/core';
@Component({
template: `<h1>Contact Us</h1>
<p>TekTutorialsHub </p>
`
})
export class ContactComponent {
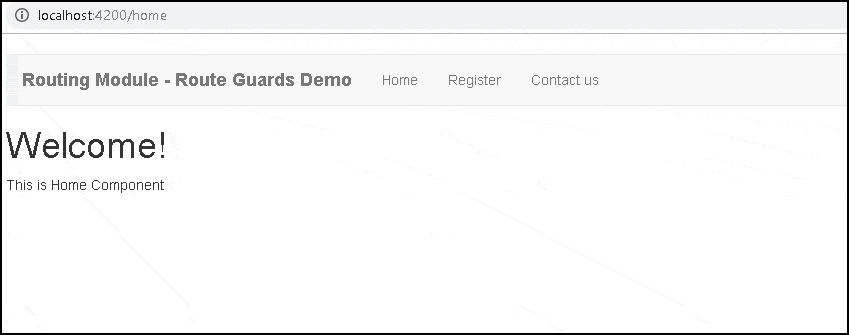
}import {Component} from '@angular/core';
@Component({
template: `<h1>Welcome!</h1>
<p>This is Home Component </p>
`
})
export class HomeComponent {
}import { Component } from '@angular/core';
import { IDeactivateComponent } from './decativate.guard';
@Component({
template: `<h1>Register User</h1>
<p> </p>`,
})
export class RegisterComponent implements IDeactivateComponent
{
//Check if there any unsaved data etc. If yes then as for confirmation
canExit() : boolean {
if (confirm("Do you wish to Please confirm")) {
return true
} else {
return false
}
}
}Summary
In this tutorial, we learned how to make use of CanDeactivate Guard. This guard is used to stop the user from accidentally leaving the route, before saving their work.


What to do if I want warning message if I navigate from url with parms to with out parms of same url.
It’s not working as expected.
Is there any other options?
CanDesactivateFn ?
rfgythukl
Thanks for the help! worked great!
thanks.