In this step by step tutorial, we guide you to How to Download and Install Visual Studio 2017. The installation of Visual Studio 2017 has become much simpler, compared to its previous editions. You can choose the component that you wish to download and install. Visual Studio 2017 allows you to run different versions of Visual Studio side-by-side.
Table of Contents
Editions of Visual Studio 2017
Visual Studio 2017 is available in three different editions
- Visual Studio 2017 Community Edition
- Visual Studio 2017 Professional Edition
- Visual Studio 2017 Enterprise Edition
Visual Studio 2017 Community edition
Visual Studio 2017 Community edition is free under the following conditions
- It is free if you are an individual developer. You can use it to develop commercial applications and sell it.
- It is free, if you are an organization and satisfies all of the following conditions
- if you have less than 250 PC
- Your annual revenue is less than one million U.S. dollars.
- You are allowed to install it in a maximum of 5 PCs.
- if you have less than 250 PC
In both, the above cases You must register your copy using a Microsoft Account.
Difference between Visual Studio 2017 Professional & Community Edition
The Only difference between Professional Edition and Community Edition is the CodeLens feature. Using Codeless you can Find code changes and other histories. It tells what last changes were made to the file with reference history and who changed it
Difference between Visual Studio 2017 Professional & Enterprise Edition
The Enterprise Edition is packed with many features compared to the Professional edition. Here is the list of features available only in Enterprise Edition.
Integrated Development Environment
- Live Dependency Validation
- Architectural Layer Diagrams
- Architecture Validation
- Code Clone
Advanced Debugging and Diagnostics
- IntelliTrace
- Code Map Debugger Integration
- .NET Memory Dump Analysis
Testing Tools
- Live Unit Testing
- Test Case Management
- Web Load & Performance Testing
- IntelliTest
- Microsoft Fakes (Unit Test Isolation)
- Code Coverage
- Lab Management
- Coded UI Testing
- Manual Testing with Microsoft Test Manager
- Exploratory Testing with Microsoft Test Manager
- Fast-forward for Manual Testing with Microsoft Test Manager
Cross-platform Development
- Embedded Assemblies
- Xamarin Inspector
- Xamarin Profiler
- Compare the Editions
You can compare the difference between each edition from the following link https://www.visualstudio.com/vs/compare/
System Requirement for Visual Studio 2017
Supported OS
Windows 10
- Minimum Version 1507
- Editions Supported Home, Professional, Education & Enterprise
Windows Server 2016
- Editions Supported: Standard & Data Center
Windows 8.1
- Install the update: 2919355
- Editions Supported: Core, Professional, and Enterprise
Windows Server 2012 R2
- Install the update: 2919355
- Supported Editions: Essentials, Standard, Datacenter
Windows 7 SP1
- Editions Supported: Home Premium, Professional, Enterprise, Ultimate
Hardware
These are the minimum hardware requirements to run Visual Studio 2017
- You need a 1.8 GHz or faster processor.
- A Dual-core Processor or better
- Minimum 2 GB of RAM. But 4 GB of RAM recommended
- Installation takes around 130 GB of Hard disk space.
- The minimum display resolution of 720p (1280 by 720). Display resolution of WXGA (1366 by 768) or higher is recommended.
Other Requirements
- Dotnet Framework 4.5: Download link.
- Administrator rights are required to install Visual Studio
License Terms
Click on the following links to visit the license terms
Download Visual Studio 2017
Click on the link below to download the latest version
Link to All Visual Studio 2017 Downloads
Download & Install Visual Studio 2017
1. Installing the prerequisites
Before beginning installation, install the following prerequisites
Make sure you have dotnet framework 4.5 is installed You can download it from the following link
If you are on Windows 8.1 or Windows Server 2012 R2, you need to install the update 2919355
2. Download Visual Studio 2017
Or you can go to
All Visual Studio 2017 Downloads
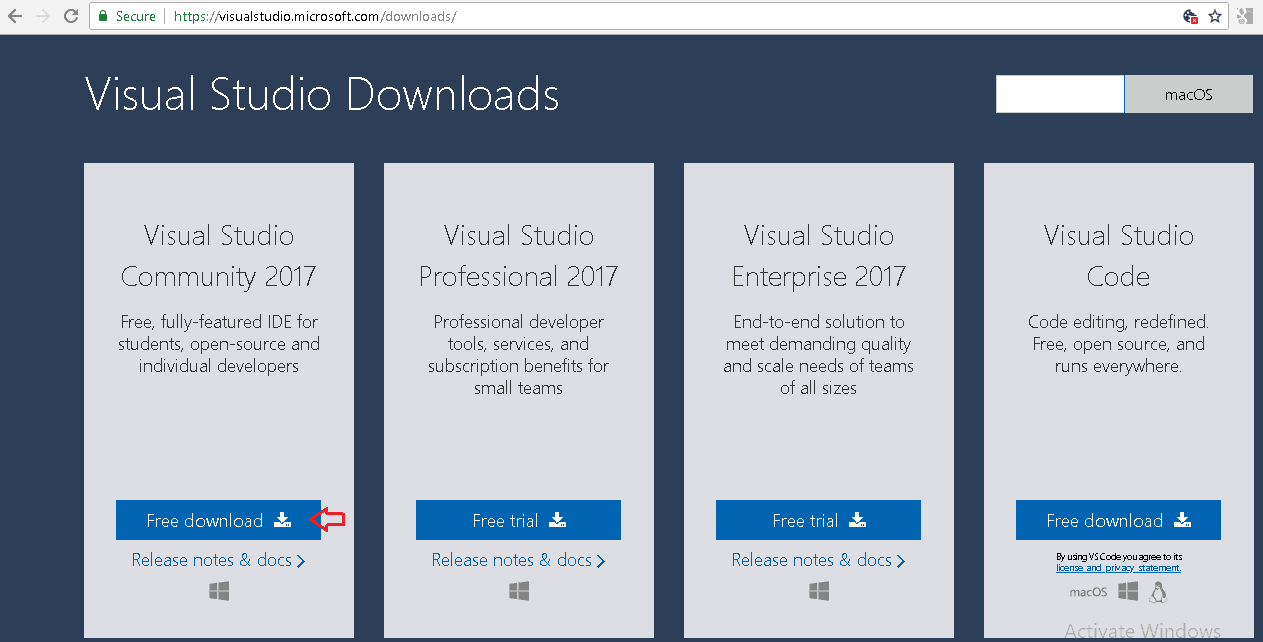
And once the download is complete, it will appear on the bottom left-hand side as shown below.
3. Starting Installation
Double-click on the downloaded file to begin the installation

You will be asked for permission to continue. Click on Yes to continue with the installation.
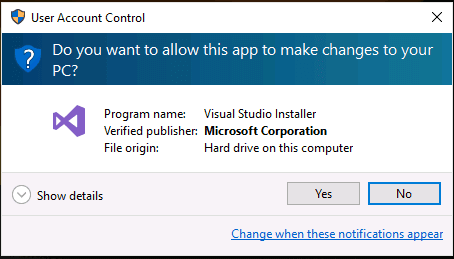
4. Software License Terms
Next, you will be asked to accept the software License terms and Privacy Statement. Click on continue to go ahead with the installation.
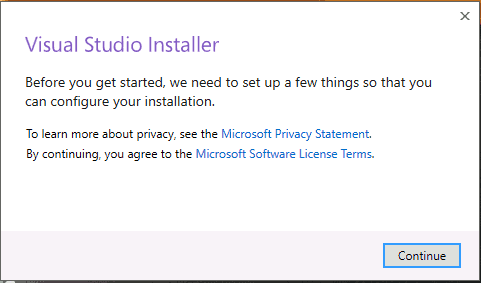
5. Installer Downloads the required files
The Installer fetches the required files to install the Visual Studio 2017. This process will take few minutes
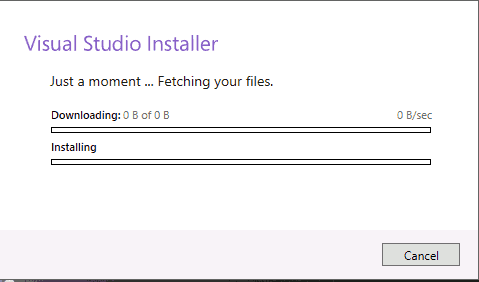
6. Choosing what to install
The Installer will ask for the features you wish to install. You have four options here
- Workloads
- Individual Components
- Language Packs
- Installation Location
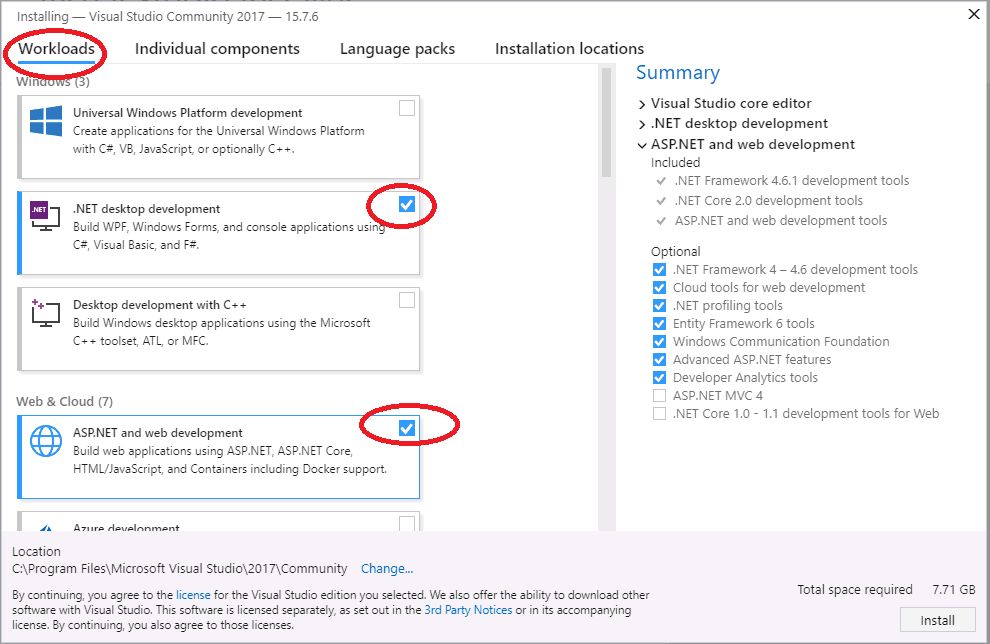
Select Workloads
The First Option is to select Workloads.
A workload is a group of individual components based on the project type. For Example, if you are developing using ASP.NET for web development then you can choose ASP.NET and web development workload which will install the following components for you
- .Net Framework 4.6
- C# and Visual Basic
- ASP.NET and web development tools
- Entity Framework tools
- Typescript SDK
- IIS Express
- NuGet Package Manager
Click here to see the complete list of workloads in Visual Studio 2017
Select the required Workload. I have chosen .NET Desktop development & ASP.NET and web development.
Select individual components (Optional)
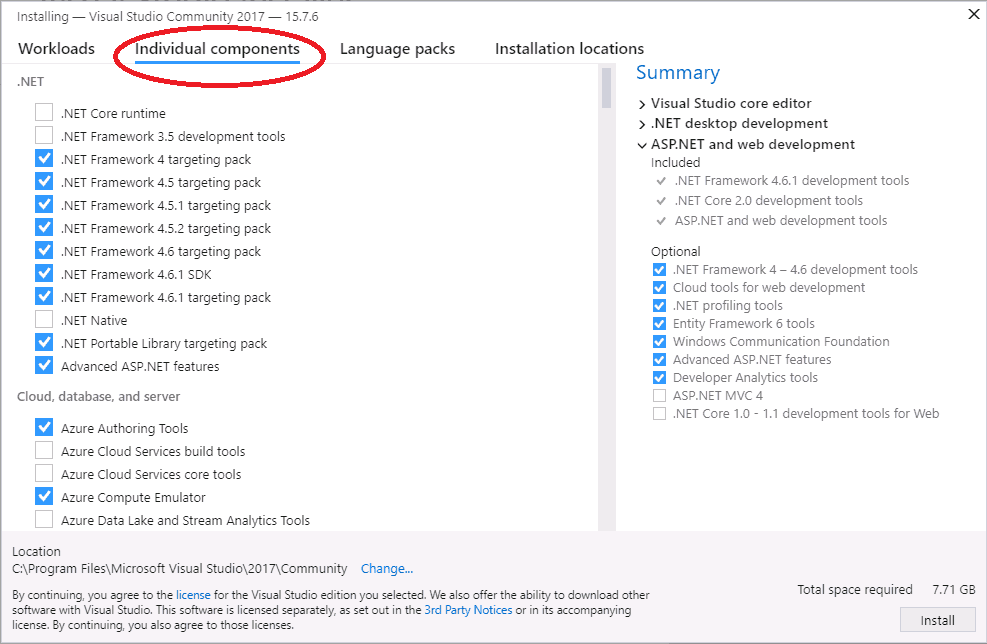
The Second Option gives an exhaustive list of components that you can install. Choosing the workloads automatically selects the components that are part of that workload. You can further customize what you want to install from this option.
Select the required components
Select language packs (Optional)
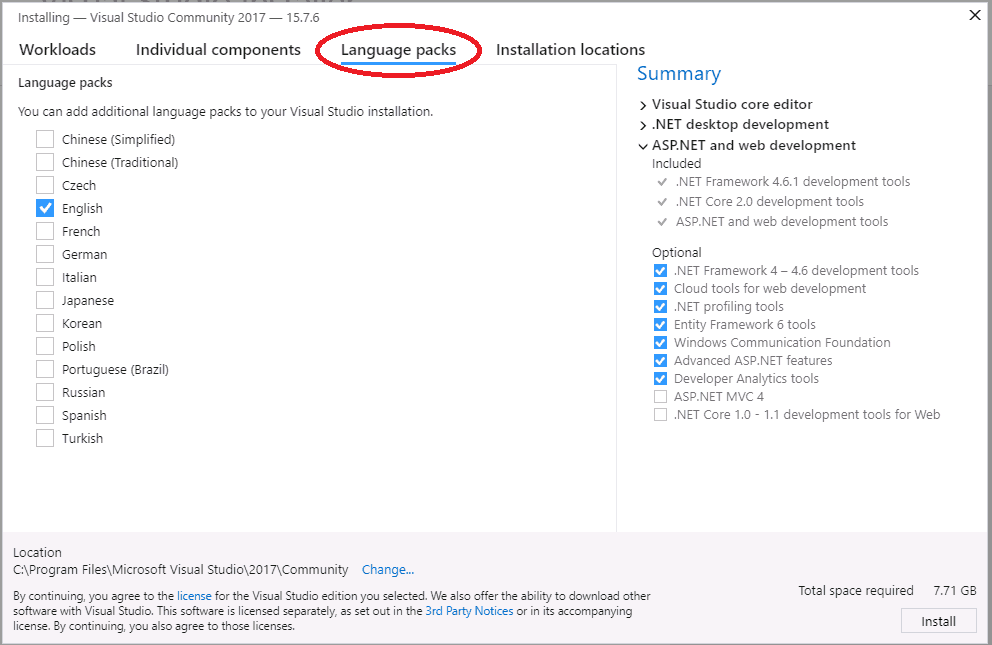
The language is automatically picked up from the language configured from the operating system. You can change it from this Tab.
Select Installation Location
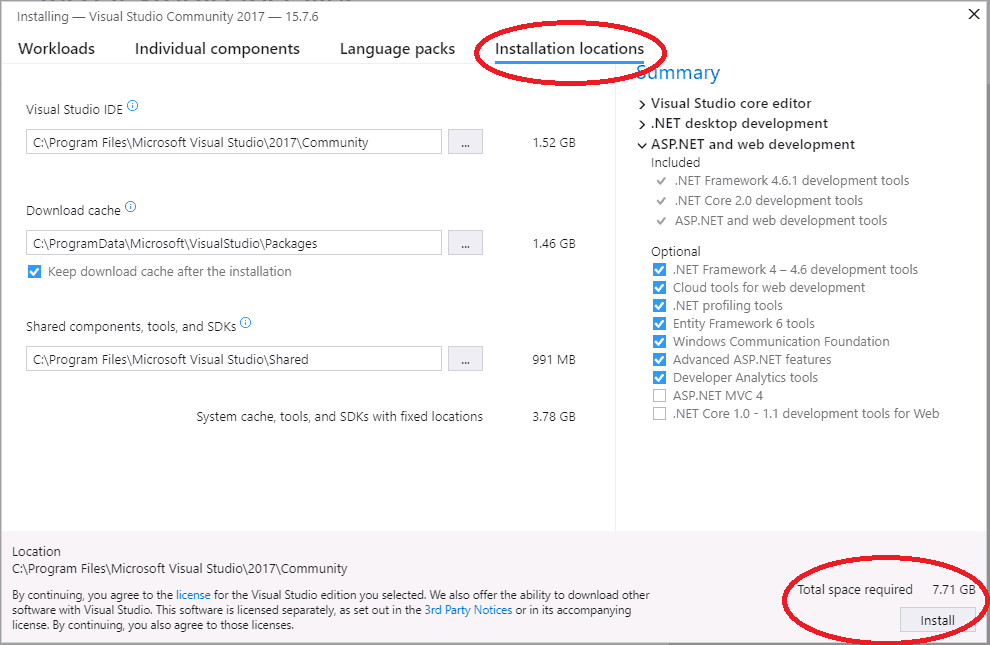
The Final tab is the installation location. Change the location if you wish to
7. Installing
Now, click on the Install button to begin installation of Visual Studio 2017.
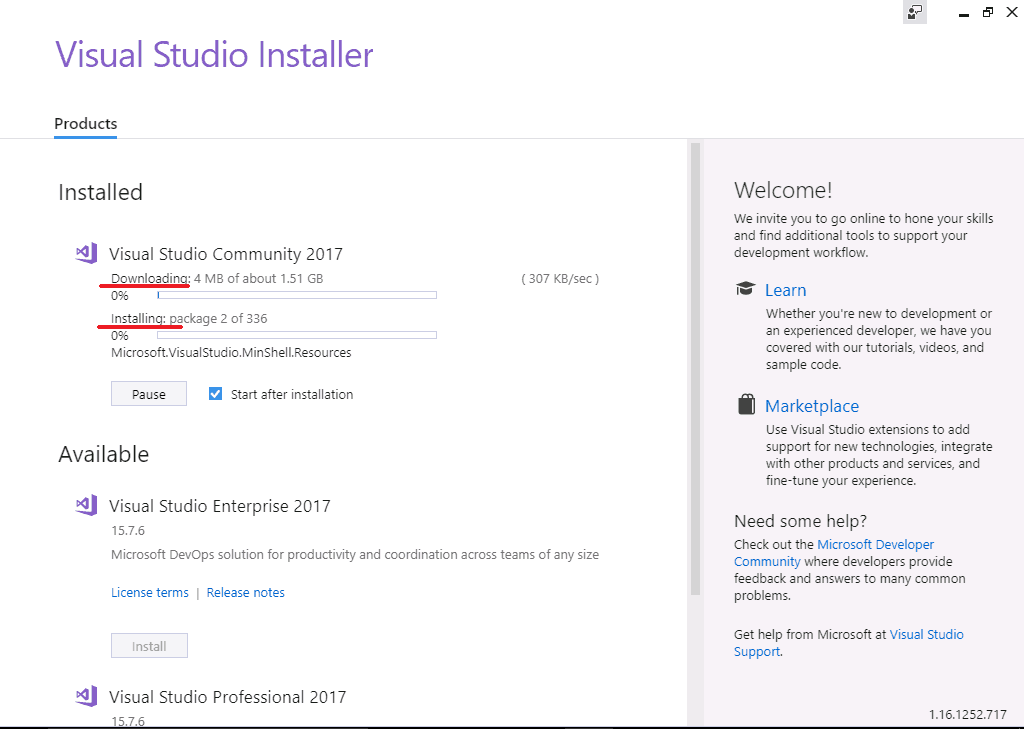
The installer will now download each component from the internet and starts the installation. This will take a while depending on your internet speed.
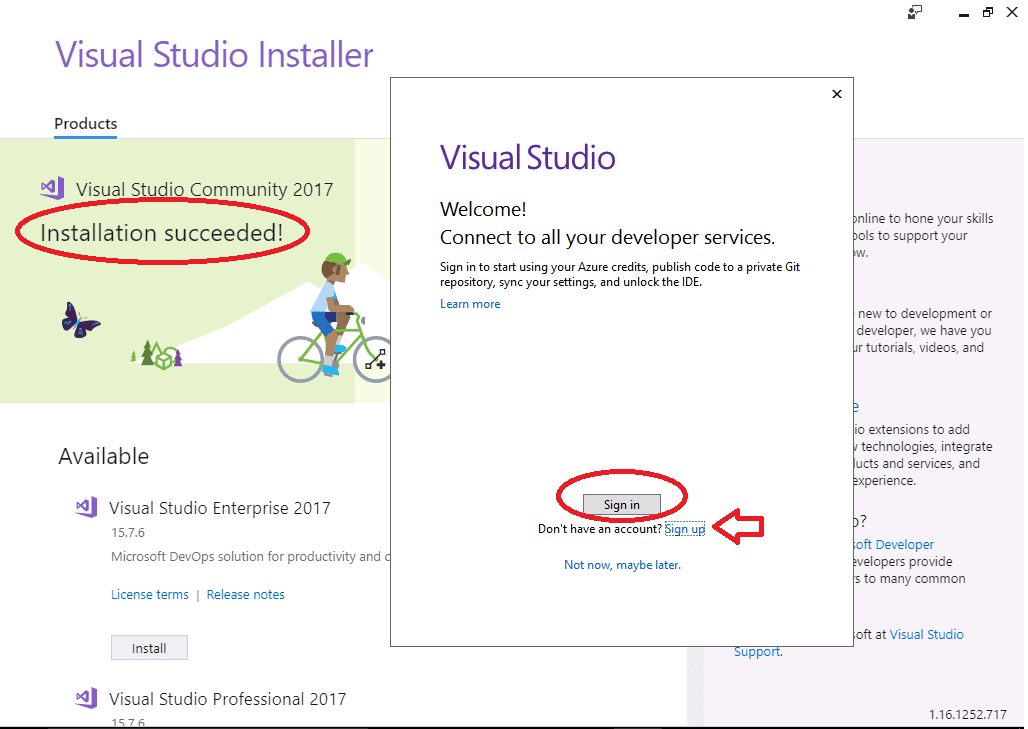
Once the installation is complete, you will be presented with the Installation succeeded message along with the option to register
Registration
Next, Sign in window appears, you can Sign in or click on Sign up to create a new account. In case if you wish to continue without Signing in click on “Not now, maybe later” and proceed. You can sign in later from the option Help -> Register Product.
Note that Community edition will expire after 30 days if you do not register your copy
Setup the initial environment
Next, the following screen appears, where you are requested to enter the Development Settings & You can sign in later from the option Help -> Register Product. Select accordingly.
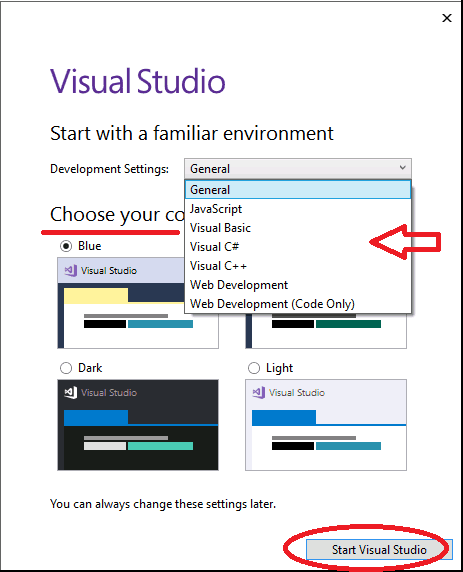
Click on Start Visual Studio and start working on Visual Studio 20017.

my console application is not there
I am looking for a download link that I can use on download manager to download Visual Studio 2015
after downloading visual studio 2017 , not able to find SSRS option where i can create report
Thanks
Under menu -> Tools -> Extensions & Updates
Search Microsoft Reporting Services Projects & install
Close and restart VS 2017
where to find “Microsoft analysis service project”