In this tutorial, let us look at how to download & Install ASP.NET Core and set up the development environment. To get started with ASP.NET Core development, first, we need to install .NET SDK (previously .NET Core SDK). We also need an IDE or Code editor. In this tutorial, we will show you where to find .NET SDK, how to install it & find out the current version of the SDK & Runtime. For IDE, we will use the Visual Studio 2022 community edition. You can also use Visual Studio Code if you are on Mac or Linux.
Table of Contents
Installing ASP.NET Core
To develop applications using ASP.NET Core, you need to install
- .NET SDK
- Code editor (Visual Studio/Visual Studio Code)
Additionally, if you need to run the ASP.NET Core application under the IIS Server, then you also need to install the ASP.NET Core Hosting Bundle.
Installing .NET SDK /.NET Core SDK
We need .NET SDK or (previously known as .NET Core SDK) to develop ASP.NET Core applications. .NET is installed along with the Visual Studio. But in case you require the latest version or if you are not using Visual Studio, then you need to manually download & Install it.
You can download the .NET SDK from the link https://dotnet.microsoft.com/en-us/download/dotnet page, where you can choose any version of the. NET.
Click on the .NET version. That will take you to the download page.
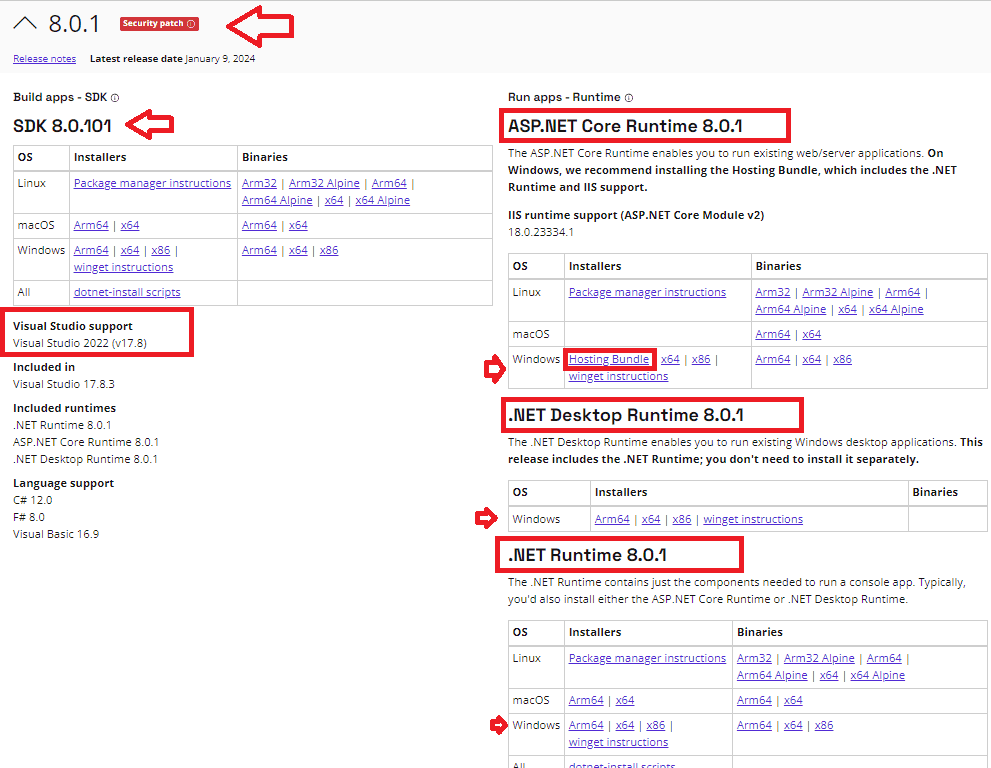
If you are using Visual Studio, then check for Visual Studio support.
The SDK download on the top left-hand side contains all the runtimes (i.e. ASP.NET Core runtime, .NET Desktop runtime & .NET Runtime). Hence no need to install them separately.
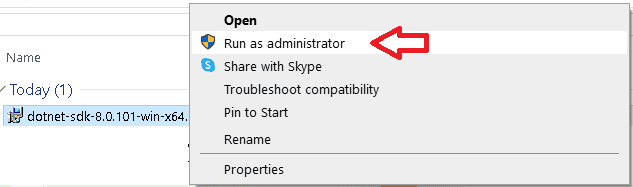
Select the SDK and download it. Select the downloaded SDK, right click and select Run as administrator
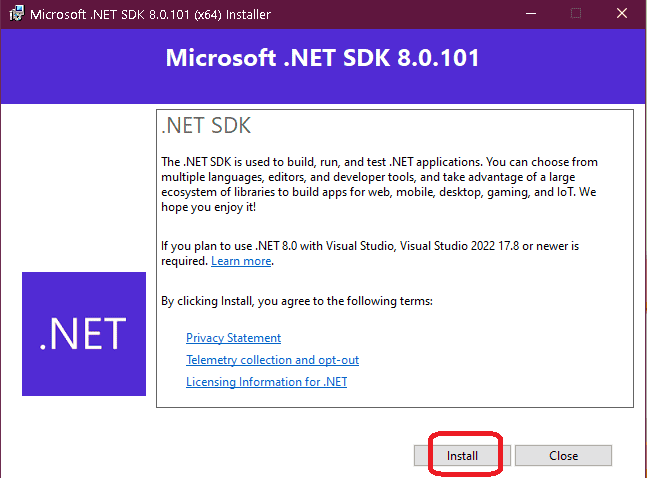
Click on Install to Accept the Terms and begin installation.
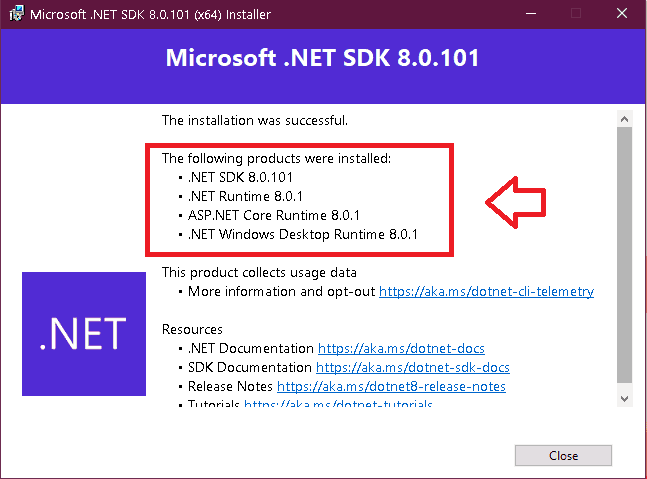
Installation finishes. You can check the components that are installed.
Now, you can start developing applications using ASP.NET Core. If you have any issues and need more information on installing .NET then refer to the link on how to download & Install .NET Core.
Installing Visual Studio
Visual Studio is the IDE of choice when it comes to developing Applications in Windows OS. You need to install the latest edition of Visual Studio 2022.
Visual Studio 2022
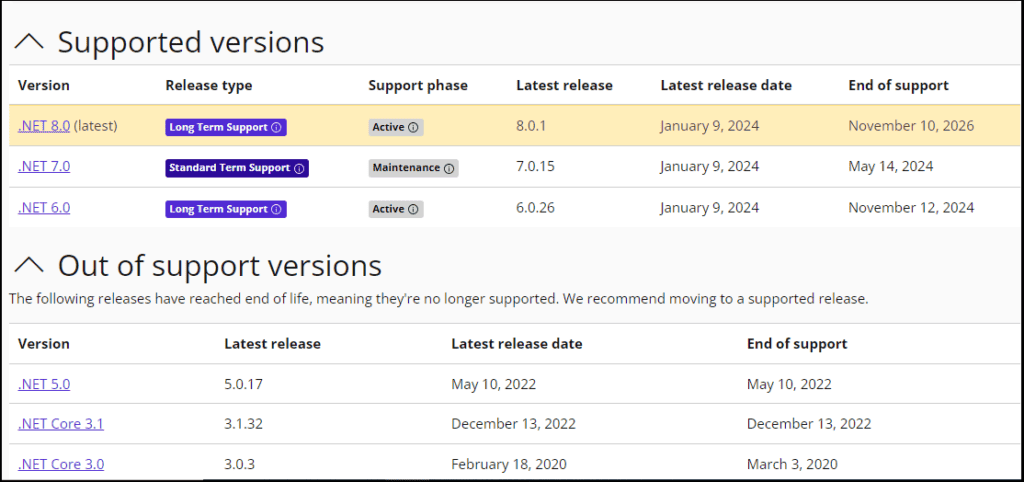
Visual Studio 2022 Supports supports the .NET core 3.1, .NET 5, .NET 6 & .NET 7. It will not support the versions before .NET core 3.1
Click on the link How to download and install Visual Studio 2022 to install Visual Studio 2022
While Installing Visual Studio Choose ASP.NET Web development Workload
Visual Studio 2019
Visual Studio 2019 supports .NET Core 3.1 & .NET 5. For Versions higher than .NET 5, you need to install Visual Studio 2022. Click on the link How to download and install Visual Studio 2019 to install the Visual Studio 2019
Visual Studio 2017
You can use Visual Studio 2017, only if you are using .NET Core 2.1 or less. You need to use Visual Studio 2017 Update 15.3.4 or higher. Click on the link How to download and install Visual Studio 2017 to install the Visual Studio 2017.
Visual Studio 2015
Visual Studio 2015 works only if you are using .NET Core version <= 1.1, which is no longer supported by Microsoft
How to find out which dot net core version is installed on your PC
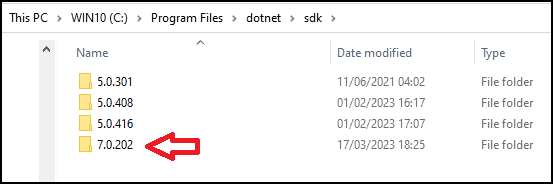
Open the folder C:\Program Files\dotnet\sdk or C:\Program Files (x86)\dotnet\sdk. You should be able to see all the Dot net Core versions installed in your PC
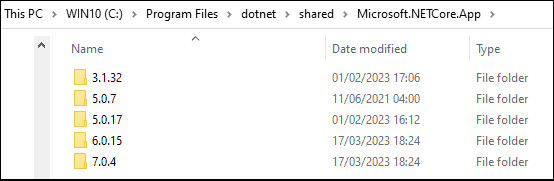
You can check the version of the Dot net core runtime from the folder C:\Program Files\dotnet\shared\Microsoft.NETCore.App
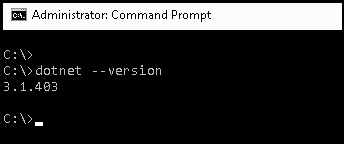
Find out the version of the dotnet core installed from the command line using the command
1 2 3 | dotnet --version |
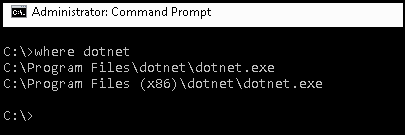
Use where dotnet to find out the location of dotnet.exe.
1 2 3 | where dotnet |
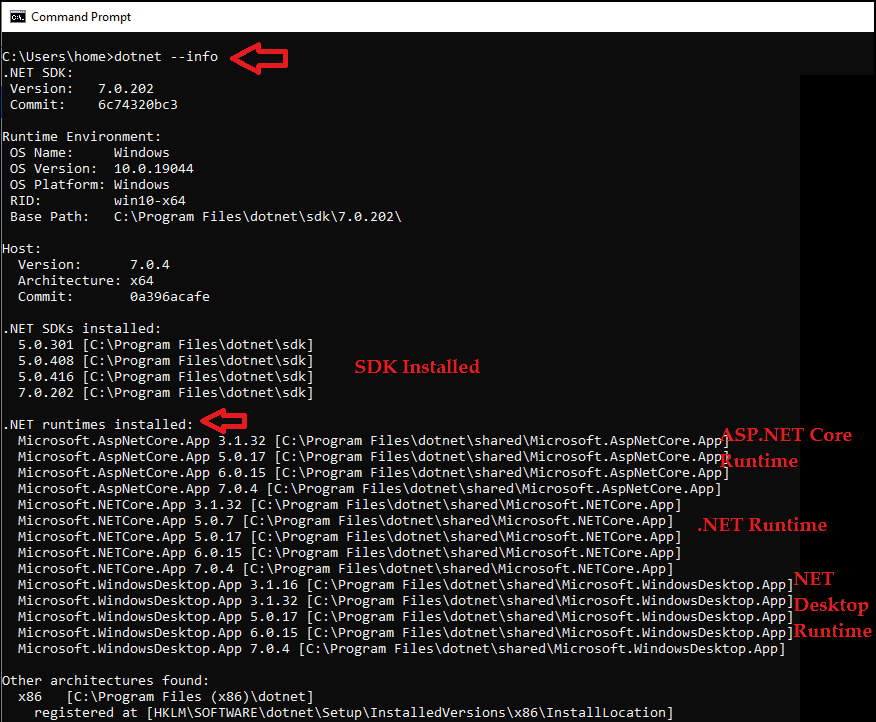
You can also use dotnet --info to list of all SDK & Core Version
1 2 3 | dotnet --info |
Visual Studio Code
Visual Studio Code is another option for the IDE. This is the ideal option if you are on a Mac or Linux.
You need to install the following
Visual Studio Code from https://code.visualstudio.com
VS Code C# extension from https://marketplace.visualstudio.com/items?itemName=ms-vscode.csharp
Summary
In this tutorial, we looked at how to install the prerequisites needed for developing Applications with ASP.NET Core. In the next tutorial, we will look at the dot net CLI, the new command-line interface.