In this step-by-step guide, we will show you how to install Angular. We use the Angular CLI to install Angular, which hides the complexities of installing Angular. But before installing Angular, we must install NodeJs and NPM Package Manager.
Table of Contents
How to Install Angular
To install Angular, you will need to install the following.
- Install Node.js and npm (Node Package Manager)
- Installing Typescript (optional)
- Install the Angular CLI
Installing NodeJs & NPM Package Manager
Why NodeJs is Required
You must install NodeJs and the NPM package manager to develop an Angular application. Note that neither of them is required on the production server.
Angular uses Node.js for its build and development tools. For example, the angular compiler must transpile the TypeScript code into JavaScript. It also needs to perform steps like minification, bundling, and build optimization of the final code. To run all these tools, it needs Node.js.
NodeJs also spins up a lightweight web server. Angular uses it to host the application during development.
NPM Package Manager (NPM)
Angular uses the Node Package Manager to install and manage its dependencies. NPM Package manager comes bundled with the NodeJs.
We will use NPM to install Angular, TypeScript, and any other packages/modules our application requires. NPM can be used to upgrade these packages as and when necessary. Without NPM, we have to download and install all these packages manually.
Installing NodeJs
You can download NodeJS and install it. NPM is installed as part of NodeJS. Click on the installing node for the instructions and procedures.
Installing Typescript
Angular requires TypeScript. Angular is written using Typescript. It is the language that you must use to develop Angular applications.
Typescript is nothing but a superset of JavaScript. It is built on top of JavaScript and introduces syntax enhancements. It brings support for types and class-based object-oriented programming to the world of Javascript. When we compile (or Transpile) a Typescript code it produces Javascript. You can refer to our Typescript Tutorial, to learn more about it.
Angular requires a TypeScript Compiler Installed as it needs to compile the Typescript code to JavaScript. But you do not need to install it as it downloaded and installed automatically when we install Angular.
If you wish, you can install the Typescript using the following npm command.
npm install -g typescriptInstalling Angular
We install Angular using the Angular Command Line Interface (Angular CLI)
The Angular CLI helps us quickly create an application with all the configuration files and packages in one command. It also helps us add features (components, directives, services, etc) to existing Angular applications.
The Angular CLI creates the Angular Application and uses Typescript, Webpack ( for Module bundling), Karma ( for unit testing), Protractor ( for end-to-end testing).
Installing Angular CLI
We use the npm command to install the Angular
npm i -g @angular/cli@latest The above command installs the latest version of Angular CLI on your machine. Note that we have used the -g flag (which stands for global) to install the Angular CLI system-wide so you can use it in all your projects.
In Windows machines, the npm requires rights to run the PowerShell scripts. By default, it may be disabled in Windows clients. You may need to enable it, if you want to install Angular CLI via npm. You can enable the rights by running the following script.
Set-ExecutionPolicy -Scope CurrentUser -ExecutionPolicy RemoteSigned
Read the message and follow the directions. Also, be sure you understand the implications of setting up an execution policy.
You can also install the older version of Angular as shown below. The following will installs the Angular Version 6.1.1 locally in the folder Angular6.
md Angular6
cd Angular6
npm i @angular/[email protected]
Finding the Angular CLI Version
You can find out the Currently Installed Angular CLI Version by Using the Command
ng --versionThe latest version of writing this article is 11.1.0. The command above also gives the version of the node installed in your system. You can keep track of the latest Angular CLI release from this link.
The Angular CLI also installs the Typescript and all its dependencies.
With the installation of Angular CLI, you are ready to create your first Angular Application.
Create a new Application
To create a new application, run the following command
ng new helloWorldThis will create a new workspace and a project called helloworld. To run the new application run the following command
cd helloWorld
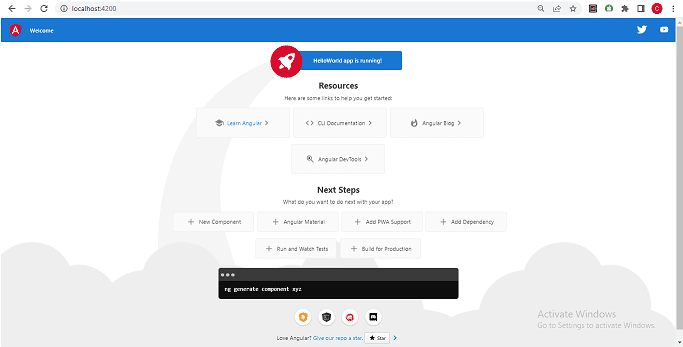
ng serveOpen the browser and go to http://localhost:4200/
Installing Visual Studio Code
When it comes to choosing an IDE to develop Angular applications, we have a lot of choices. You can select Angular IDE, Webstorm, Sublime Text, etc.
We will be using Visual Studio Code as our editor. Visual Studio Code is an open-source project and free to use. It can run on Windows, Linux, and OS X. It has IntelliSense support, easy integration with Git, and support for debugging applications. Visual Studio code also has excellent support for Typescript.
You can download Visual Studio Code from the following link. The installation procedure is an easy task and a straightforward process.
Summary
To install Angular, you need to install the following
- Install Visual Studio Code.
- Install Node.js and npm (Node Package Manager)
- Install the Angular CLI using the command
npm i -g @angular/cli@latest

