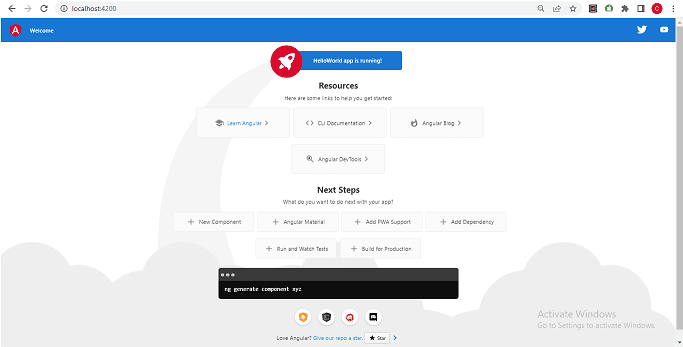
In this article on Bootstrapping in Angular, let us find out how Angular works internally and bootstraps our app. We used ng new to create a new Angular project. It generates lots of boilerplate codes. It also configures TypeScript, the esbuild + Vite build pipeline, and the unit testing environment (Karma by default, with support for Jest). The app, when run, displays a simple HTML page with several useful links to Angular. Now let us break up this app and look at what happens when the app starts until it displays the HTML page.
Angular 17 Notes
Angular before 14 used ngModule to bootstrap the application. Since the introduction of Standalone Components, ngModule has become optional and is no longer the default choice. This article is also updated accordingly. The following is some of the major changes
- Standalone Components (NgModule optional)
- bootstrapApplication() instead of platformBrowserDynamic().bootstrapModule()
- esbuild + Vite dev server instead of Webpack
- Signals-based reactivity and optional Zone.js
Table of Contents
Create a new Angular Application
We’ll start with a new application to learn how Angular works internally.
Install Angular and run the following command to create a new Angular application.
npm install -g @angular/cli
ng new getting-started
cd getting-started
ng serve
Angular creates a standalone application by default, meaning:
No AppModule
No NgModule bootstrap
Component-first architecture
Bootstrapping in Angular
What is a Bootstrapping
Bootstrapping is the process of initializing or loading our Angular application.
Angular takes the following steps to load our first view.
- Browser loads the Index.html
- Loads Angular & Third-party libraries & Application
- Executes application entry point (main.ts)
- Executes the Root Component (app.component.ts)
- Displayes the template (app.component.html)
Browser loads the Index.html
Web apps need a starting point. Index.html is usually the first page to load. Let us open the file and find out what it contains. You will find it under the src folder.
<!doctype html>
<html lang="en">
<head>
  <meta charset="utf-8">
  <title>GettingStarted</title>
  <base href="/">
  <meta name="viewport" content="width=device-width, initial-scale=1">
  <link rel="icon" type="image/x-icon" href="favicon.ico">
</head>
<body>
  <app-root></app-root>
</body>
</html>
There are no javascript files in the index.html. Neither there is a stylesheet file. The body of the files has the following HTML tag.
<app-root></app-root>How do Angular loads? To find out, let us build our application
Building Application
To run our application, we use the Angular CLI command ng serve.
ng serve builds our application but does not save the compiled application to the disk. It saves it in memory and starts the development server. ng serve also watches over the project. If we make any changes to the application, it will re-compile and update the file.
To view the compiled application, we need to build the project. We can do that using the ng build. Open the command prompt and run the ng build command. This will build and copy the output files to the dist\getting-started\browser folder (Older versions copied the files to the dist\gettingstarted folder).
ng buildNow open the dist\ and open the getting-startedindex.html.
<!DOCTYPE html>
<html lang="en" data-critters-container>
  <head>
    <meta charset="utf-8" />
    <title>GettingStarted</title>
    <base href="/" />
    <meta name="viewport" content="width=device-width, initial-scale=1" />
    <link rel="icon" type="image/x-icon" href="favicon.ico" />
    <link rel="stylesheet" href="styles-5INURTSO.css" />
  </head>
  <body>
    <app-root></app-root>
    <script src="polyfills-FFHMD2TL.js" type="module"></script>
    <script src="main-QF56Q6XA.js" type="module"></script>
  </body>
</html>
You can see that the compiler included two JavaScript files and a one CSS files.
polyfills.js – This is Browser compatibility layer. This has compatibility scripts for supporting the variety of the older and modern browsersmain.js – Application code including the tree shaked and optimized Angular framework.styles.css – Styles of the application included as CSS. The older versions used to load the styles from Javascript file
There is no longer
runtime.jsvendor.jsstyles.js(CSS is emitted as real CSS, not JS)
Angular 16 Notes
Since Angular 16, the CLI uses esbuild and a Vite-based dev server instead of Webpack for faster builds and HMR.
Angular 14 Notes
Angular 14 includes four script files. They are runtime, polyfills, styles, & main.
There was no CSS file.
runtime.js: Webpack runtime filepolyfills.js – Polyfill scripts for supporting the variety of the latest modern browsersstyles.js – This file contains the global style rules bundled as a javascript file.vendor.js – contains the scripts from the Angular core library and any other 3rd party library. main.js – code of the application.
The Webpack module loader adds these files.
Webpack is a bundler. it scans our application looking for JavaScript files and merges them into one ( or more) big file. Webpack has the ability to bundle any kind of file like JavaScript, CSS, SASS, LESS, images, HTML, & fonts, etc.
The Angular CLI uses Webpack as a module bundler. Webpack needs a lot of configuration options to work correctly. The Angular CLI sets up all these configuration options behind the scene.
The Webpack traverses through our application, looking for JavaScript and other files, and merges all of them into one or more bundles. In our example application, it has created five files.
Angular discontinues the support for IE 11. Hence removes the differential loading from version 13.
Angular 12 Update:
ng build does a production build. In the prior versions of Angular, we needed to specify the flag ng build --prod for a production build. The production build optimizes, minimizes, and uglifies the code.
You can use the ng build --optimization=false to stop the compiler from optimizing, minimizing, and uglifing the code.
Angular 7 Update:
Since Angular 7, we have had a new feature called conditional polyfill loading (differential loading). Now Angular builds two versions of script files, one for es2015 (runtime-es2015.js, polyfills-es2015.js, vendor-es2015.js, main-es2015.js) & another for es5 (runtime-es5.js, polyfills-es5.js, vendor-es5.js, main-es5.js). The es2015 (es6) is for modern browsers, and es5 is for older browsers, which do not support the new features of es2015.
Angular used the nomodule attribute, which tells the modern browser to ignore and not load the script. Hence es5 scripts are not loaded in modern browsers.
Angular 2 Update:
Angular 2 generated only three script files ( inline.js, styles.bundle.js & main.bundle.js).
Loads Angular & Third-party libraries & Application
So when index.html is loaded, the Angular loads its core library and application code via main.js. Now the angular needs to locate the entry point.
Application Entry point
The entry point of our application is main.ts. You will find it under the src folder.
angular.json
The Angular finds out the entry point from the configuration file angular.json. This file is located in the root folder of the project. The relevant part from angular.json is shown below
{
  "$schema": "./node_modules/@angular/cli/lib/config/schema.json",
  "version": 1,
  "newProjectRoot": "projects",
  "projects": {
    "GettingStarted": {
      "projectType": "application",
      "schematics": {},
      "root": "",
      "sourceRoot": "src",
      "prefix": "app",
      "architect": {
        "build": {
          "builder": "@angular-devkit/build-angular:application",
          "options": {
            "outputPath": "dist/getting-started",
            "index": "src/index.html",
            "browser": "src/main.ts",       <===
            "polyfills": [
              "zone.js"
            ],
The main entry under the node projects -> GettingStarted -> architect -> build -> options -> main points towards the src/main.ts. This file is the entry point of our application.
Angular 6 Update:
The angular-cli.json was the configuration file in Angular 5 and before. It is now angular.json since the version Angular 6.
Application entry point (main.ts)
The main.ts file is shown below.
import { bootstrapApplication } from '@angular/platform-browser';
import { appConfig } from './app/app.config';
import { AppComponent } from './app/app.component';

bootstrapApplication(AppComponent, appConfig)
  .catch((err) => console.error(err));
Let us look at the relevant code in detail.
import { bootstrapApplication } from '@angular/platform-browser';This line imports the bootstrapApplication function from the @angular/platform-browser package.
What is bootstrapApplication
bootstrapApplication() is the API responsible for starting an Angular application in a web browser. It performs the following tasks internally:
- Creates the browser platform
- Initializes the Angular dependency injection system
- Sets up the rendering engine
- Starts change detection
- Instantiates the root component
- Attaches it to the DOM
Angular applications can be bootstrapped on different platforms. For example:
- Browser (Angular)
- Mobile (Ionic, NativeScript)
- Server (Angular Universal for SSR)
Each platform provides its own bootstrap mechanism. In modern Angular, the browser platform is initialized using bootstrapApplication().
import { AppComponent } from './app/app.component';The above line imports AppComponent. This is the root component of the application.
In Angular 17, applications are no longer required to have a root NgModule. Instead, the root component itself acts as the entry point and declares its own dependencies using the standalone: true flag.
bootstrapApplication(AppComponent)
.catch(err => console.error(err));
This statement bootstraps the application by:
- Creating the application injector
- Loading the root component
- Rendering it inside the
<app-root>element defined inindex.html
Angular 15+ Update Note
import { platformBrowserDynamic } from '@angular/platform-browser-dynamic';

import { AppModule } from './app/app.module';

platformBrowserDynamic().bootstrapModule(AppModule)
  .catch(err => console.error(err));
The module platformBrowserDynamic from the library@angular/platform-browser-dynamic
platformBrowserDynamic is the module responsible for loading the Angular application in the desktop browser
Angular Applications can be bootstrapped in many ways and in many platforms. For example, we can load our application in a Desktop Browser or in a mobile device with Ionic or NativeScript.
If you are using the nativescript, then you will be using platformNativeScriptDynamic it from nativescript-angular/platform library and will be calling platformNativeScriptDynamic().bootstrapModule(AppModule). Read more about the Angular Nativescript bootstrap process here.
import { AppModule } from ‘./app/app.module’;
The above line imports AppModule. The AppModule is the Root Module of the app. The Angular applications are organized as modules. Every application built in Angular must have at least one module. The module loaded first when the application is loaded is called a root module.
platformBrowserDynamic().bootstrapModule(AppModule)
.catch(err => console.error(err));
TheplatformBrowserDynamic loads the root module by invoking the bootstrapModule and giving it the reference to our Root module i.e AppModule
The prior versions of main.ts also contained a call to enableProdMode();. This is no longer needed, hence removed from Angular 15.
Root Module
The angular bootstrapper loads our root module AppModule. The AppModule is located under the folder src/app. The code of our Root module is shown below.
import { NgModule } from '@angular/core';
import { BrowserModule } from '@angular/platform-browser';

import { AppRoutingModule } from './app-routing.module';
import { AppComponent } from './app.component';

@NgModule({
  declarations: [
    AppComponent
  ],
  imports: [
    BrowserModule,
    AppRoutingModule
  ],
  providers: [],
  bootstrap: [AppComponent]
})
export class AppModule { }
The root module must have at least one root component. The root component is loaded when the module is loaded by Angular.
In our example, AppComponent is our root component. Hence we import it.
import { AppComponent } from './app.component';We use @NgModule class decorator to define an Angular Module and provide metadata about the Modules.
@NgModule({
  declarations: [
    AppComponent
  ],
  imports: [
    BrowserModule,
    AppRoutingModule
  ],
  providers: [],
  bootstrap: [AppComponent]
})
export class AppModule { }
The @NgModule has several metadata properties.
imports
We need to list all the external modules required, including other Angular modules used by this Angular Module.
Declarations
The Declarations array contains the components, directives, & pipes that belong to this Angular Module. We have only one component in our application. AppComponent.
Providers
The Providers array is where we register the services we create. The Angular dependency injection framework injects these services in components and directives. pipes and other services.
Bootstrap
The component that angular should load when this Angular Module loads. The component must be part of this module. We want AppComponent load when AppModule loads, hence we list it here.
The Angular reads the bootstrap metadata and loads the AppComponent
AppComponent
Finally, we arrived at AppComponent, which is the root component of the our application. The code of our AppComponent is shown below
import { Component } from '@angular/core';
import { RouterOutlet } from '@angular/router';

@Component({
  selector: 'app-root',
  standalone: true,
  imports: [RouterOutlet],
  templateUrl: './app.component.html',
  styleUrl: './app.component.css'
})
export class AppComponent {
  title = 'GettingStarted';
}
The Class AppComponent is decorated with @Component Class Decorator.
The @Component class decorator provides the metadata about the class to Angular. It has 3 properties in the above code. Selector, templateURL & styleUrls
templateURL
This property contains an HTML template, which will be displayed in the browser. The template file is app.component.html
Selector
This property specifies the CSS Selector, where our template will be inserted into the HTML. The CSS Selector in our code is app-root
Template
The AppComponent defines the template as app.component.html and the CSS Selector is app-root
We already have the app-root CSS selector defined in the index.html.
The Angular locates app-root in our index.html and renders our template between those tags.
Angular 15 Update
import { Component } from '@angular/core';

@Component({
  selector: 'app-root',
  templateUrl: './app.component.html',
  styleUrls: ['./app.component.css']
})
export class AppComponent {
  title = 'GettingStarted';
}
<body>
  <app-root></app-root>
</body>
Summary
We use ng build to build the application. The Angular compiler uses the angular.json to find the locations of application entry points (main.ts) & index.html. The compiler copies the code to the dist folder.
index.html loads the angular and third-party libraries.
We declare the root module in main.ts. Hence it will load next.
The root module declares its app.component.ts as its root component. Hence app.component loads next.
app.component.ts declares app.component.html as its template and app-root as its selector. Hence the template is loaded and displayed to the user.


THANK YOU!
Not detailed enough. The word loads was used a lot but I’m not sure what it means in many contexts. Also, if index.html is loaded first and contains an app-root component, then why is this component not getting instantiated immediately, but loads main.ts first?
Great Explanation. Very clear and precise. I do have one question however.
What does the app do after it loads the app.component.html?
Thanks for the detailed explanation
The best explanation!
APPRECIATED!
very nice, except there are too many ads in-between the paragraphs…
Anyway, really appreciate your explanation, quite helpful.
Excellent, Superb !!! A MUST read for beginners.
best explaination
Best of the best. What a classic way of explanation on Angular basics. Well done.
Best of the best
Too good sir. Thank you for your efforts. very usefull.
Good Breakdown and explaination
Awesome explanation
Really good articles !
Best Tutorial so far!
Nice article. You make it simple and understandable.
What is dist folder can you explain please?
Hi, “dist” is a folder which is created once you have run the “ng build” command in order to build you Angular application for the production use. If the command finishes sucessfully, that folder will contain the build version of your Angular application which is then ready to deploy to the server.
Once you run the command “ng build”, after successful build one dist folder will create in your project. Angular will do minification for your scripts and place files inside the folder. Minification means removing whitespaces and save file size.
Nice Explanation on bootstrap…
It’s more helpful and simple than the Angular’s Documentation.
Very good article. Simple and clear explanations. Kudos!!
Wow wow. Just wow. Very very nicely written.
Please keep posting. I am bookmarking your Site.
its good for deep learning with good practices ….keep it up bro and it helps me a lot ..thank you soo much …please add some picture output with each code … 🙂
Excellent blog/doc. could not resist to share this..
Really nice explanation.
Excellent article. Explanation about entryComponents in the Module section is missing. You can add that too.
Very well structured and best angular tutorial. I am desperately looking for this kind of tutorial. Really Kudos to your work. Thank you.
Exactly what I was looking for!