In this article let us learn how to Configure the Email Service in ASP.NET Core Identity. This will enable us to confirm the Registered email account by sending a confirmation link to their mailbox.
The ASP.NET Core identity needs to send the email at three places.
- After user registration, to confirm the registered Email
- Resending the Email Confirmation Link
- During the Forgot password option
If we do not configure the Email services, then Identity API will not be able to send the Emails. In such a scenario, the identity API will generate the confirm link in the web page itself which is not safe.
Table of Contents
Create a New Web APP
Create a new ASP.NET Core Web APP with .NET 5.0 & Individual Accounts Enabled.
Update the Connection String in appsettings.json.
  "ConnectionStrings": {
    "DefaultConnection": "Server=localhost;Database=ASPNetCoreIdentityEmailDemo;Trusted_Connection=True;MultipleActiveResultSets=true"
  },
Run EF Core Migrations to create the database
update-databaseRun the app check everything is ok
Email Service
Now, let us create an Email Service to use with Identity API.
Create a new class EmailSender under the folder Services. This class must inherit from the IEmailSender interface, which is defined in the Microsoft.AspNetCore.Identity.UI.Services namespace.
The IEmailSender has only one method SendEmailAsync, which we need to implement in our concrete class. The Signature of the method is as below.
Task IEmailSender.SendEmailAsync(string email, string subject, string htmlMessage)
{
    //You Email Sending Program here
}
There are many ways in which you can send emails from your ASP.NET Core. The simplest of them is to use the Gmail & SmtpClient from the System.Net.Mail namespace.
Gmail settings
You can use any Gmail account to send emails. But to do that you need to set the App Password. Follow these steps
- Log in to your Google Account
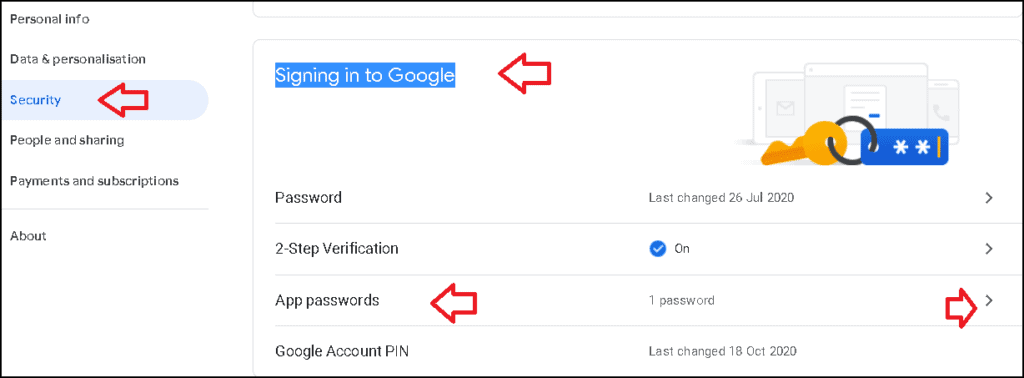
- Go to My Account > Security > Signing into Google -> App Passwords
- Enter your password
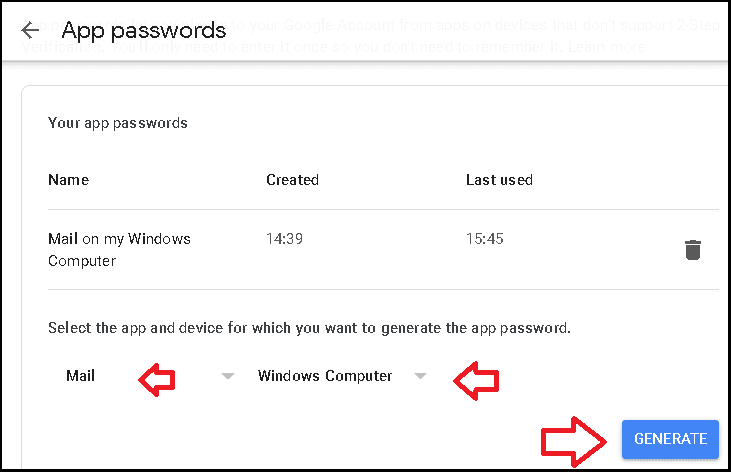
- Select the App & Devices from the Dropdown
- Click Generate
- Copy the Password & Use it along with your email account.
Step 2 My Account > Security > Signing into Google -> App Passwords
Step 4. Select the App & Devices from the Dropdown
Code to Send the Email
Here, we are using the SmtpClient to send the Email
using Microsoft.AspNetCore.Identity.UI.Services;
using System.Net;
using System.Net.Mail;
using System.Threading.Tasks;

namespace ASPNetCoreIdentityEmailDemo.Services
{
    public class EmailSender : IEmailSender
    {
        public EmailSender()
        {

        }

        public async Task SendEmailAsync(string email, string subject, string htmlMessage)
        {
            string fromMail = "[YOUREMAILID]";
            string fromPassword = "[APPPASSWORD]";

            MailMessage message = new MailMessage();
            message.From = new MailAddress(fromMail);
            message.Subject = subject;
            message.To.Add(new MailAddress(email));
            message.Body ="<html><body> " + htmlMessage + " </body></html>";
            message.IsBodyHtml = true;

            var smtpClient = new SmtpClient("smtp.gmail.com")
            {
                Port = 587,
                Credentials = new NetworkCredential(fromMail, fromPassword),
                EnableSsl = true,
            };
            smtpClient.Send(message);
        }

    }
}
We need to register this service in the startup class in theConfigureServices method.
services.AddTransient<IEmailSender, EmailSender>();Now, we are ready. Let us test our app.
Registering a User
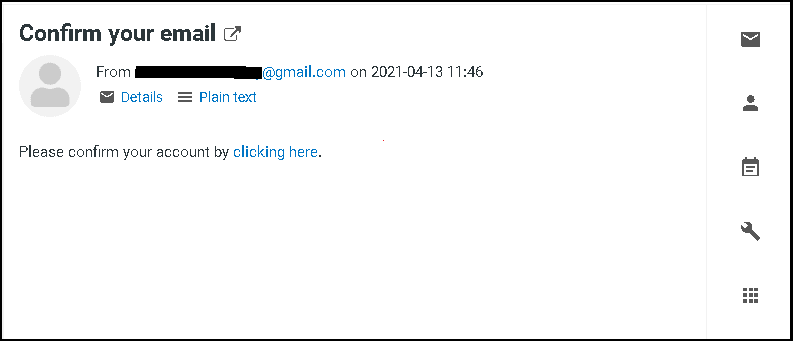
Now try to register a new user. On successful registration, you will get a Registration Confirmation message. It will also send an email with a confirmation link.
The following image shows the format of the confirmation mail. Confirm your account, by clicking on the link.
Resend Email Confirmation
If you try to log in without a confirmed account, will result in a Invalid login attempt message.
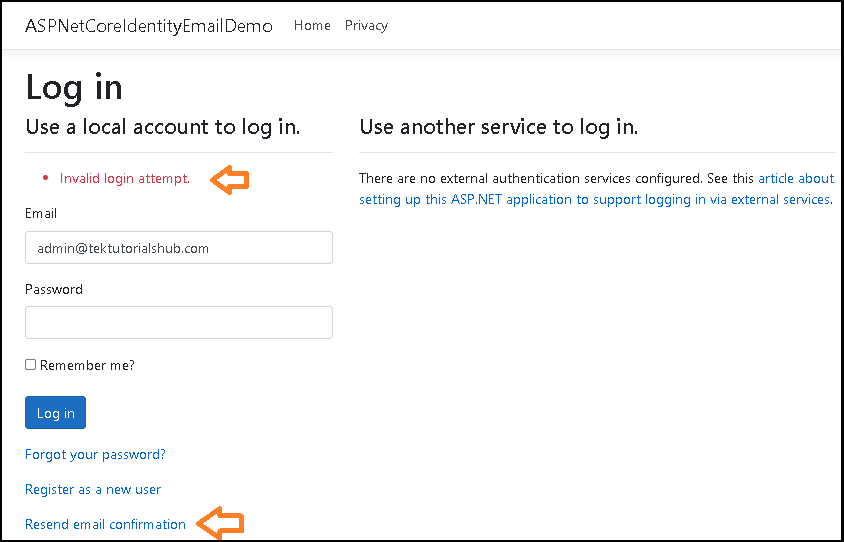
You will also have an option to resend to email confirmation, which will ask for your email id.

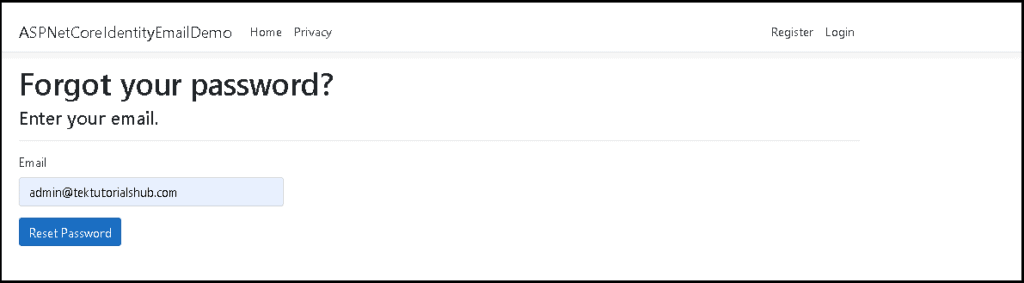
Forgot Password
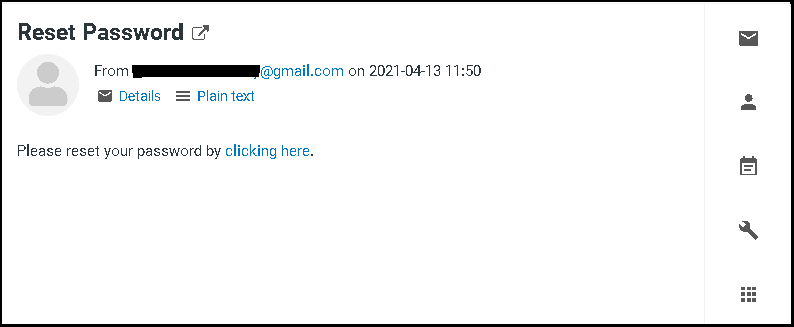
Now, check the Forgot password Option from the login form. It will ask for your registered email id. On clicking Reset Password, option you will get the reset password link in your mail box
The Reset Password mail format. Click on the link, which will take you to the ResetPassword form, where you can reset your password.
That’s it.
Read More
- ASP.NET Core Tutorial
- Authentication in ASP.NET Core
- Cookie Authentication in ASP.NET Core
- Introduction to ASP.NET Core Identity
- ASP.NET Core Identity Tutorial From Scratch
- Sending Email Confirmation in ASP.NET Core
- Add Custom Fields to the user in ASP.NET Core Identity
- Change Primary key in ASP.NET Core Identity
- JWT Authentication in ASP.NET Core
- Introduction to Authorization
- Simple Authorization using Authorize attribute
- Adding & Managing Claims in ASP.NET Core Identity
- Claim Based Authorization in ASP.NET Core
- Policy-based Authorization
- Resource-Based Authorization

that was really helpful many thanks.
great tutorial. It seems like there is 1 step missing – in order for the line in startup.cs to work (services.AddTransient();) it requires two references:
1. using Microsoft.AspNetCore.Identity.UI.Services for IEmailSender
and
2. using .Services; to access EmailSender
Thank you for this awesome tutorial